Setting Up Your Integrations
Integrations are how TheOptimizer connects to the tools you already use — your ad networks, tracking platforms, analytics dashboards, and search feed providers. Without at least one ad network connected, the platform has no campaign data to work with and no actions it can take. Integrations are the first thing you set up, and the foundation everything else builds on.
This guide walks you through every integration category, how to connect them, and how to manage them after setup.
In This Article
- All Supported Integrations
- Connecting an Ad Network
- Managing Ad Accounts
- Managing Profiles
- Connecting a Tracking Platform
- Connecting Google Analytics 4
- Connecting Google Sheets
1. All Supported Integrations
TheOptimizer organises all integrations into four categories, each serving a different role in your workflow.
Ad Networks
Ad networks are the primary source of campaign data and the target of all automation actions. TheOptimizer pulls spend, impressions, clicks, and conversion data from your connected ad networks, and sends back any actions your rules trigger — pausing campaigns, adjusting budgets, and so on.
You must connect at least one ad network before anything else in the platform can function.
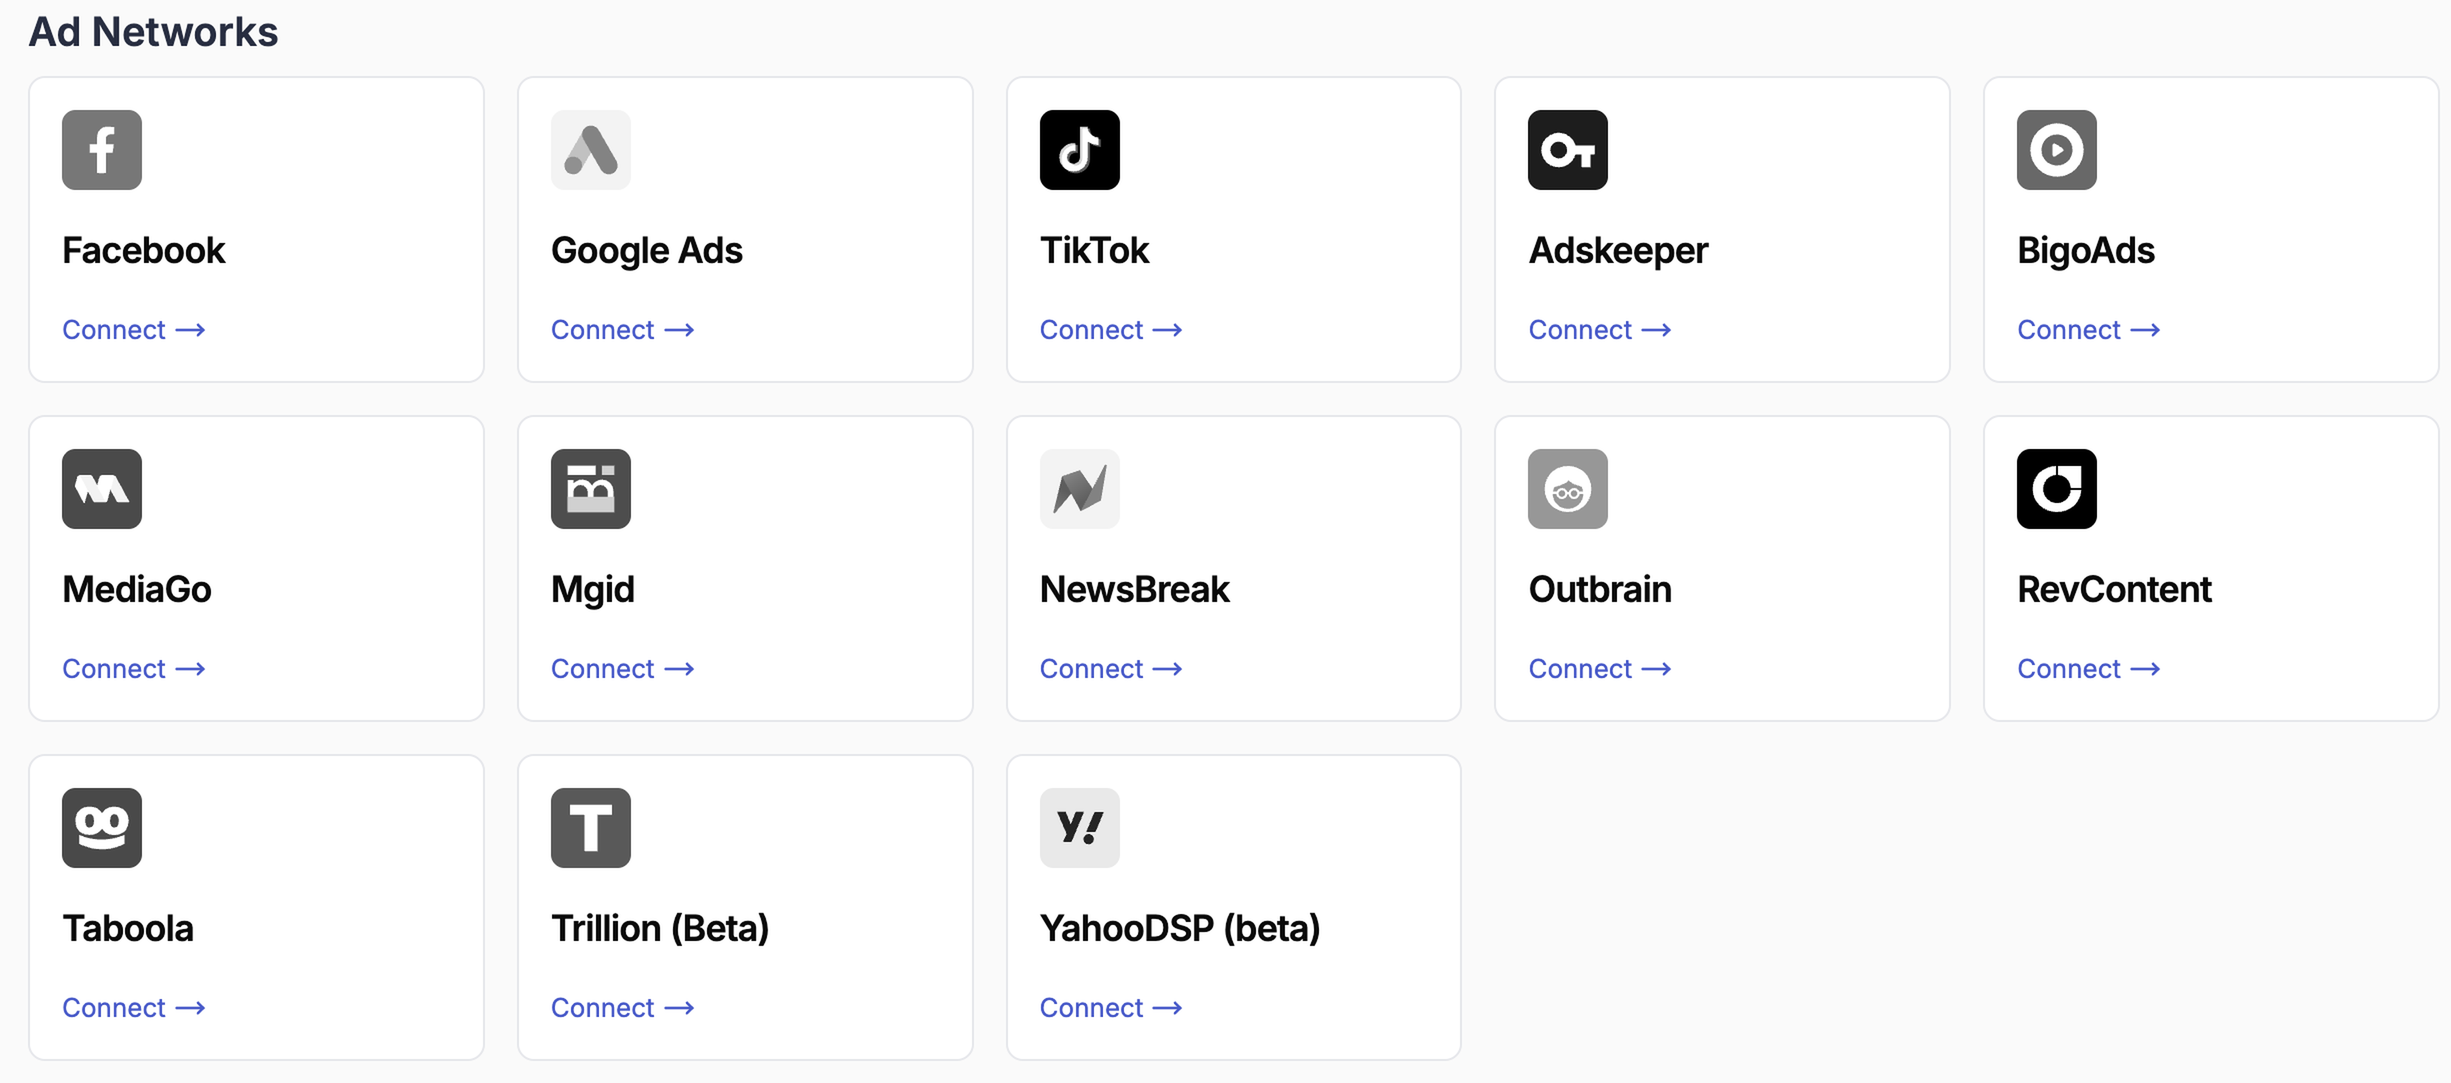
Supported ad networks include Facebook, Google Ads, TikTok, Taboola, Outbrain, Mgid, MediaGo, BigoAds, Adskeeper, RevContent, NewsBreak, Trillion (Beta), and YahooDSP (Beta).
Affiliate Tracking Platforms
Tracking platforms sit between your ads and your landing pages, providing accurate click-level reporting and advanced funnel analytics. They overcome the attribution limitations that come with cookie restrictions on ad networks, and enable features like browser and device breakdowns, funnel management, and traffic distribution.
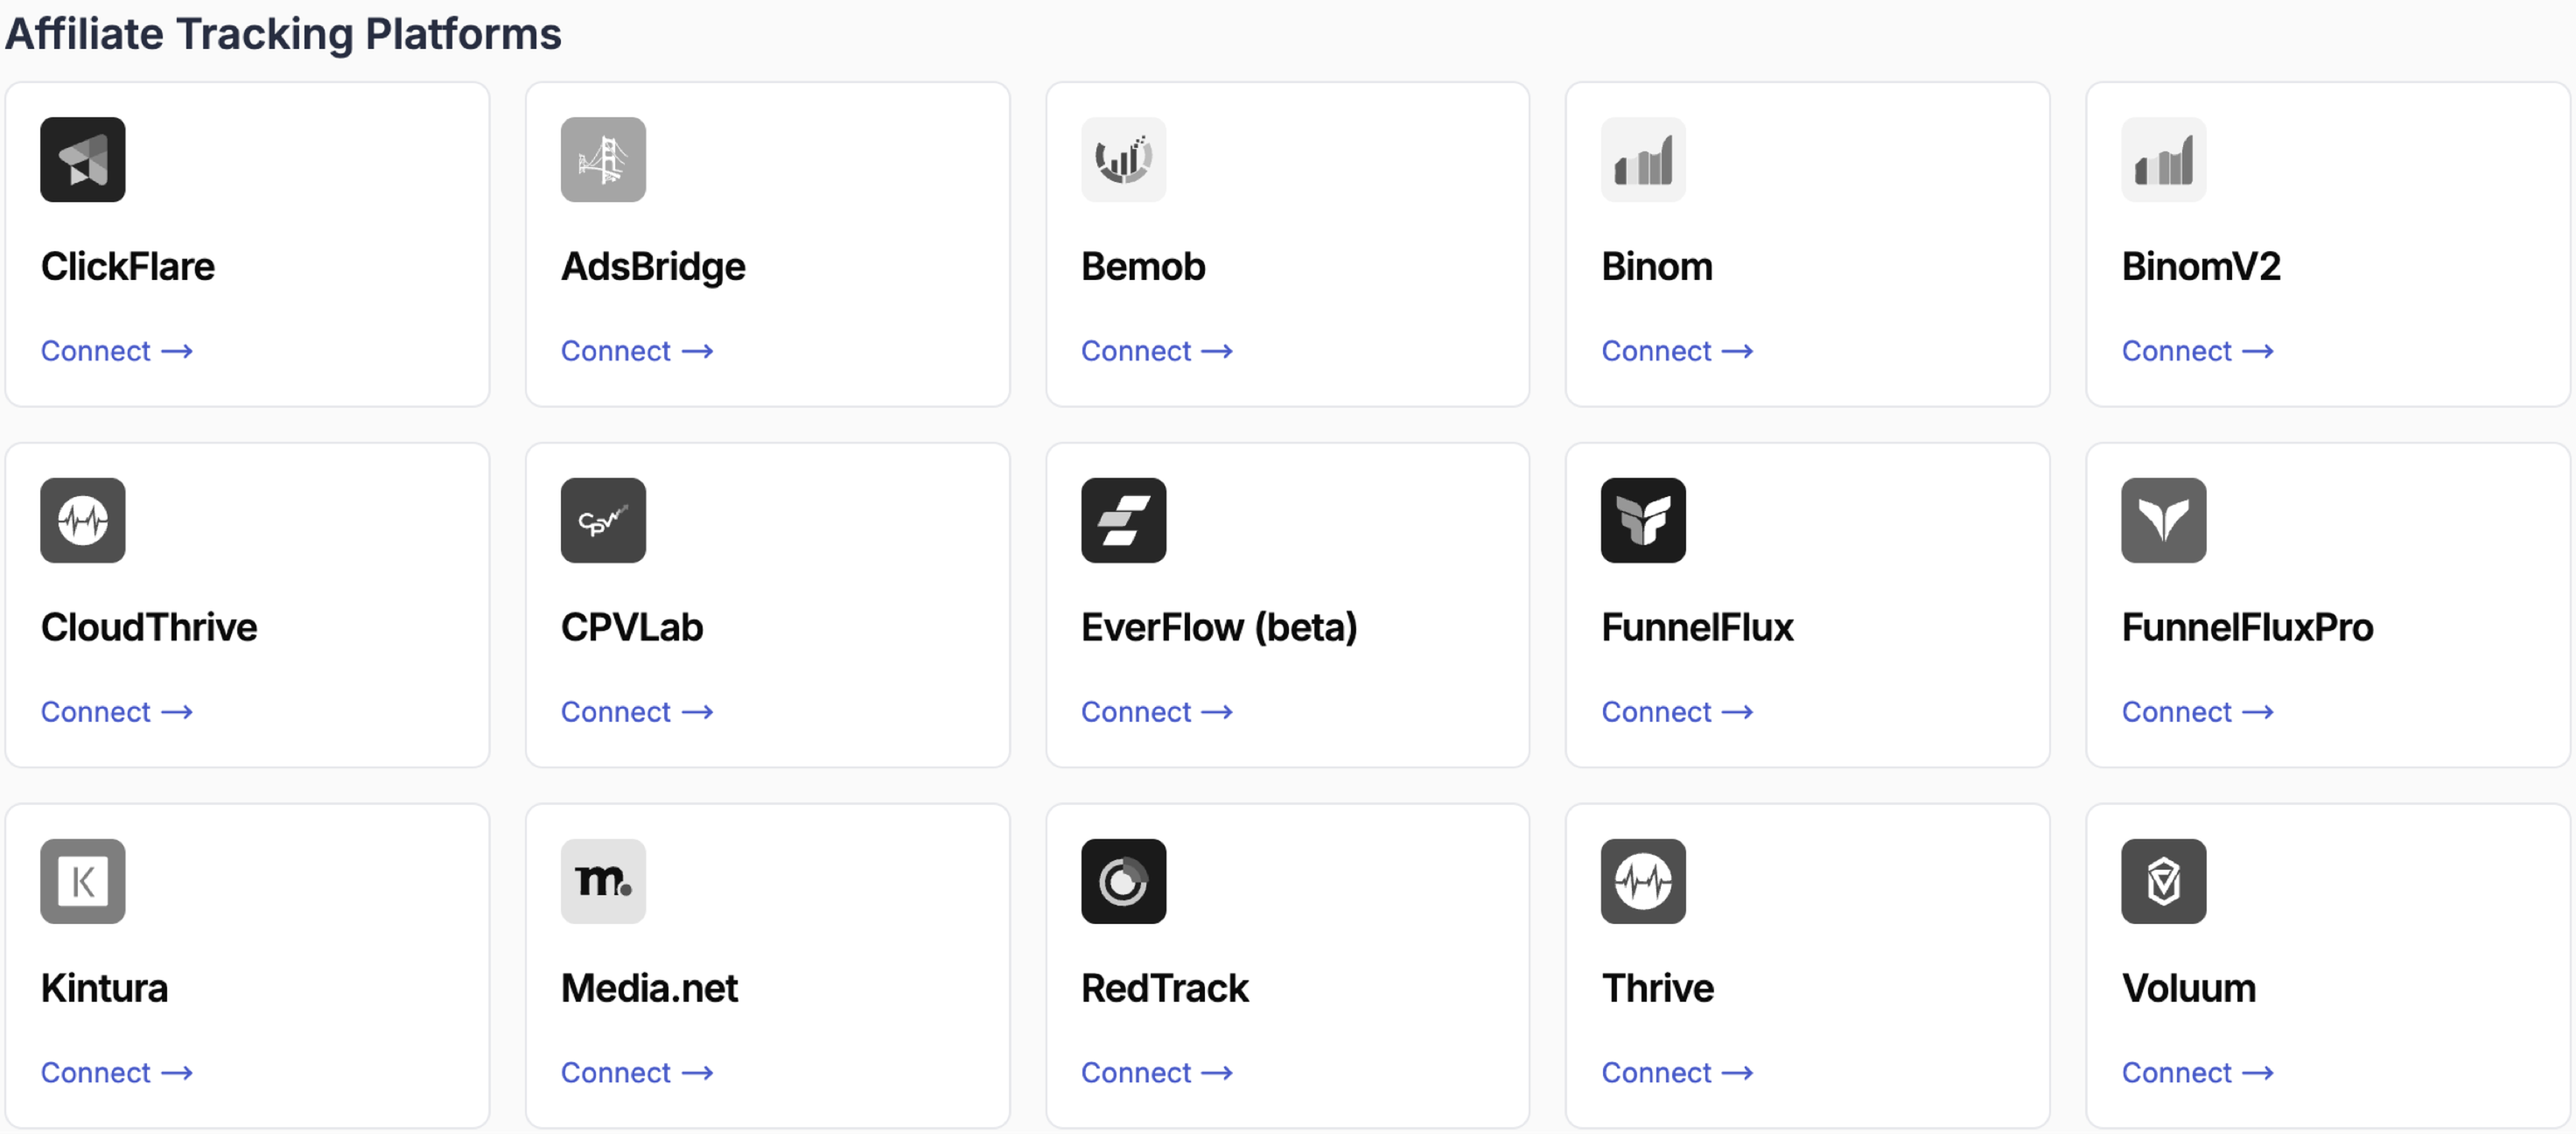
💡 Recommended tracker: ClickFlare is the recommended tracking platform for users who don't already have a preferred tool. It offers robust features, deep integration with TheOptimizer, and 24/7 support.
Other Analytics & Reporting Integrations
More analytics integrations are supported to help you bring external reporting data into TheOptimizer alongside your ad network data. This gives you a unified view without switching between tools.
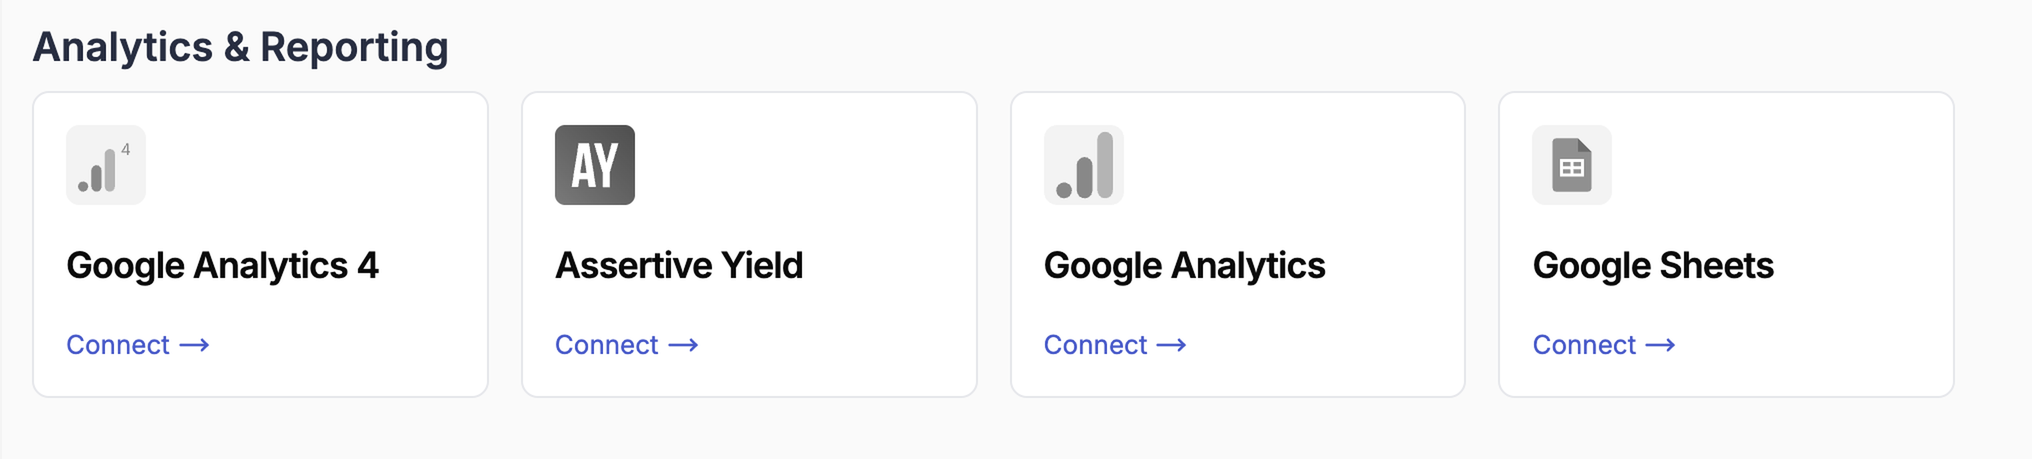
- Google Analytics 4 / Google Analytics — syncs GA data with your ad network campaign performance.
- Assertive Yield — connects yield analytics for content arbitrage operators. If you run traffic to content pages monetised through display networks (such as Taboola, Outbrain, or Google Ad Manager), Assertive Yield tracks the revenue those pages generate and makes that data available in TheOptimizer for rule-based optimisation.
- Google Sheets — pulls conversion and revenue data from a Google Sheet into TheOptimizer. This integration is designed for users whose tracking platform is not natively supported by TheOptimizer. Instead of a direct API connection, you export your conversion data (sales, revenue, events) from your tracker into a Google Sheet, and TheOptimizer reads from that sheet automatically every 30 minutes — making the data available for automation rules just like any other integration.
Search Feeds
Search feed integrations allow TheOptimizer to track click revenue and conversion data from search arbitrage campaigns. These are relevant if you run traffic to search feed monetisation pages.
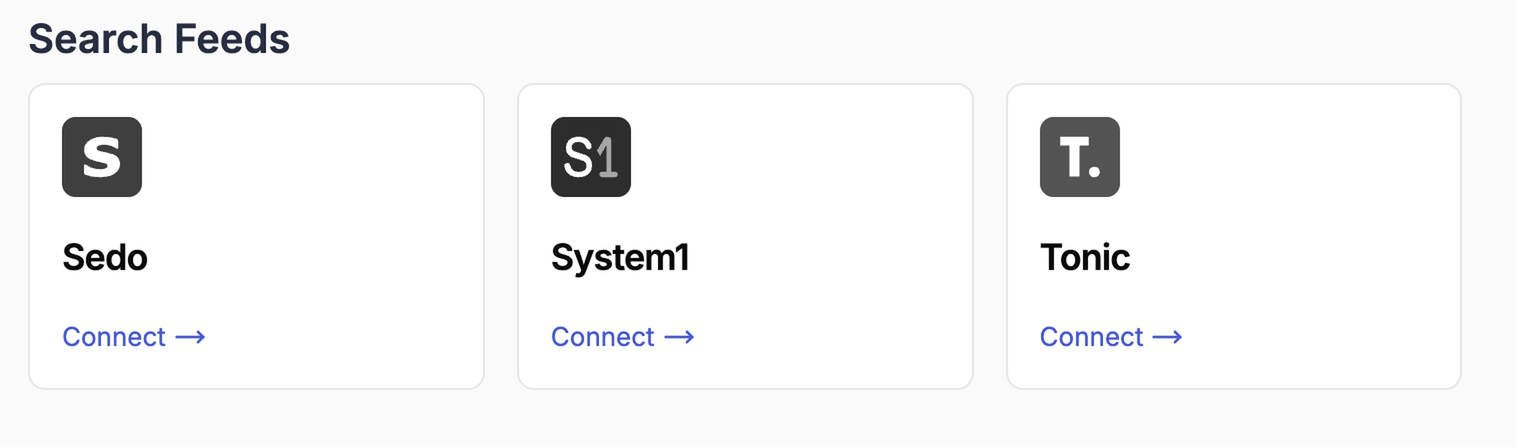
Supported providers: Sedo, System1, and Tonic.
2. Connecting an Ad Network
The connection flow is broadly the same across all ad networks — you authorise access, and TheOptimizer pulls in your accounts. The specific authorisation method varies:
| Ad Network | Auth Method |
|---|---|
| OAuth (login with Facebook) | |
| Google Ads | OAuth (login with Google) |
| TikTok | OAuth (login with TikTok) |
| All others | API credentials (key/secret) |
The steps below walk through Facebook as the example, but the process is very similar for most of the ad networks.

Step 1 — Click Connect
From the Integrations page, find the ad network you want to connect and click Connect →.
Step 2 — Authorise Pages Access
Facebook will ask which Pages you want TheOptimizer to access.
💡 Select "Opt in to all current and future Pages." This grants access to any Pages you create in the future, so you won't have to go through reauthorisation every time you launch a new campaign under a new Page.
Step 3 — Authorise Business Manager Access
Next, Facebook will ask which Business Managers to include.
Select the Business Manager that contains the ad accounts you want to manage in TheOptimizer, then click Continue.
Step 4 — Review Permissions and Complete
Facebook will show a summary of the permissions being granted. Review them and confirm to complete the authorisation.
Step 5 — Connection Confirmed
Once authorised, TheOptimizer will show a confirmation screen with the number of ad accounts added and the integration name.
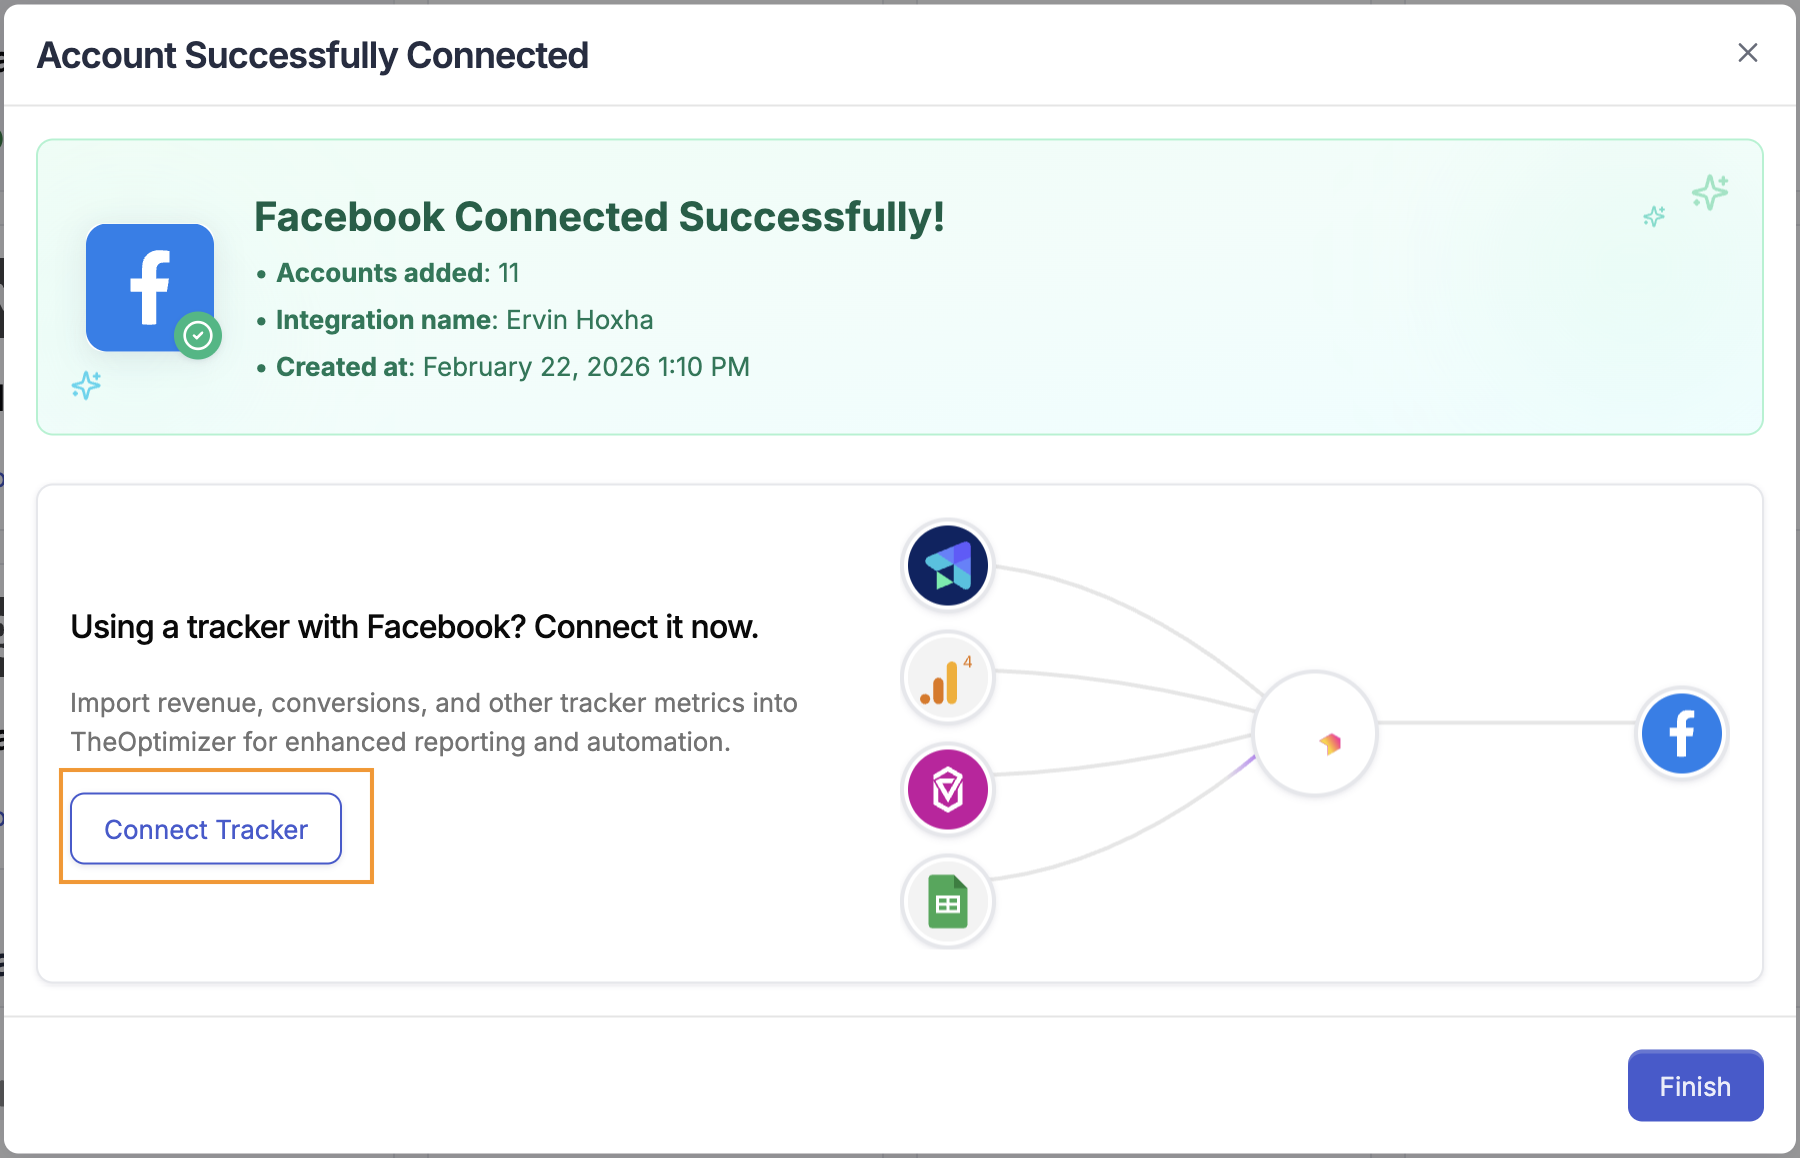
ℹ️ Initial sync takes up to 20–30 minutes. After connection, TheOptimizer starts pulling your campaign data. Campaigns and ads may not appear immediately — this is expected. Give it up to half an hour before troubleshooting.
💡 If you use a tracking platform alongside this ad network, you can connect it directly from this screen by clicking Connect Tracker . If you prefer to do it later you can ignore this step and add a tracker integration in second moment — see Section 5 for details.
3. Managing Ad Accounts
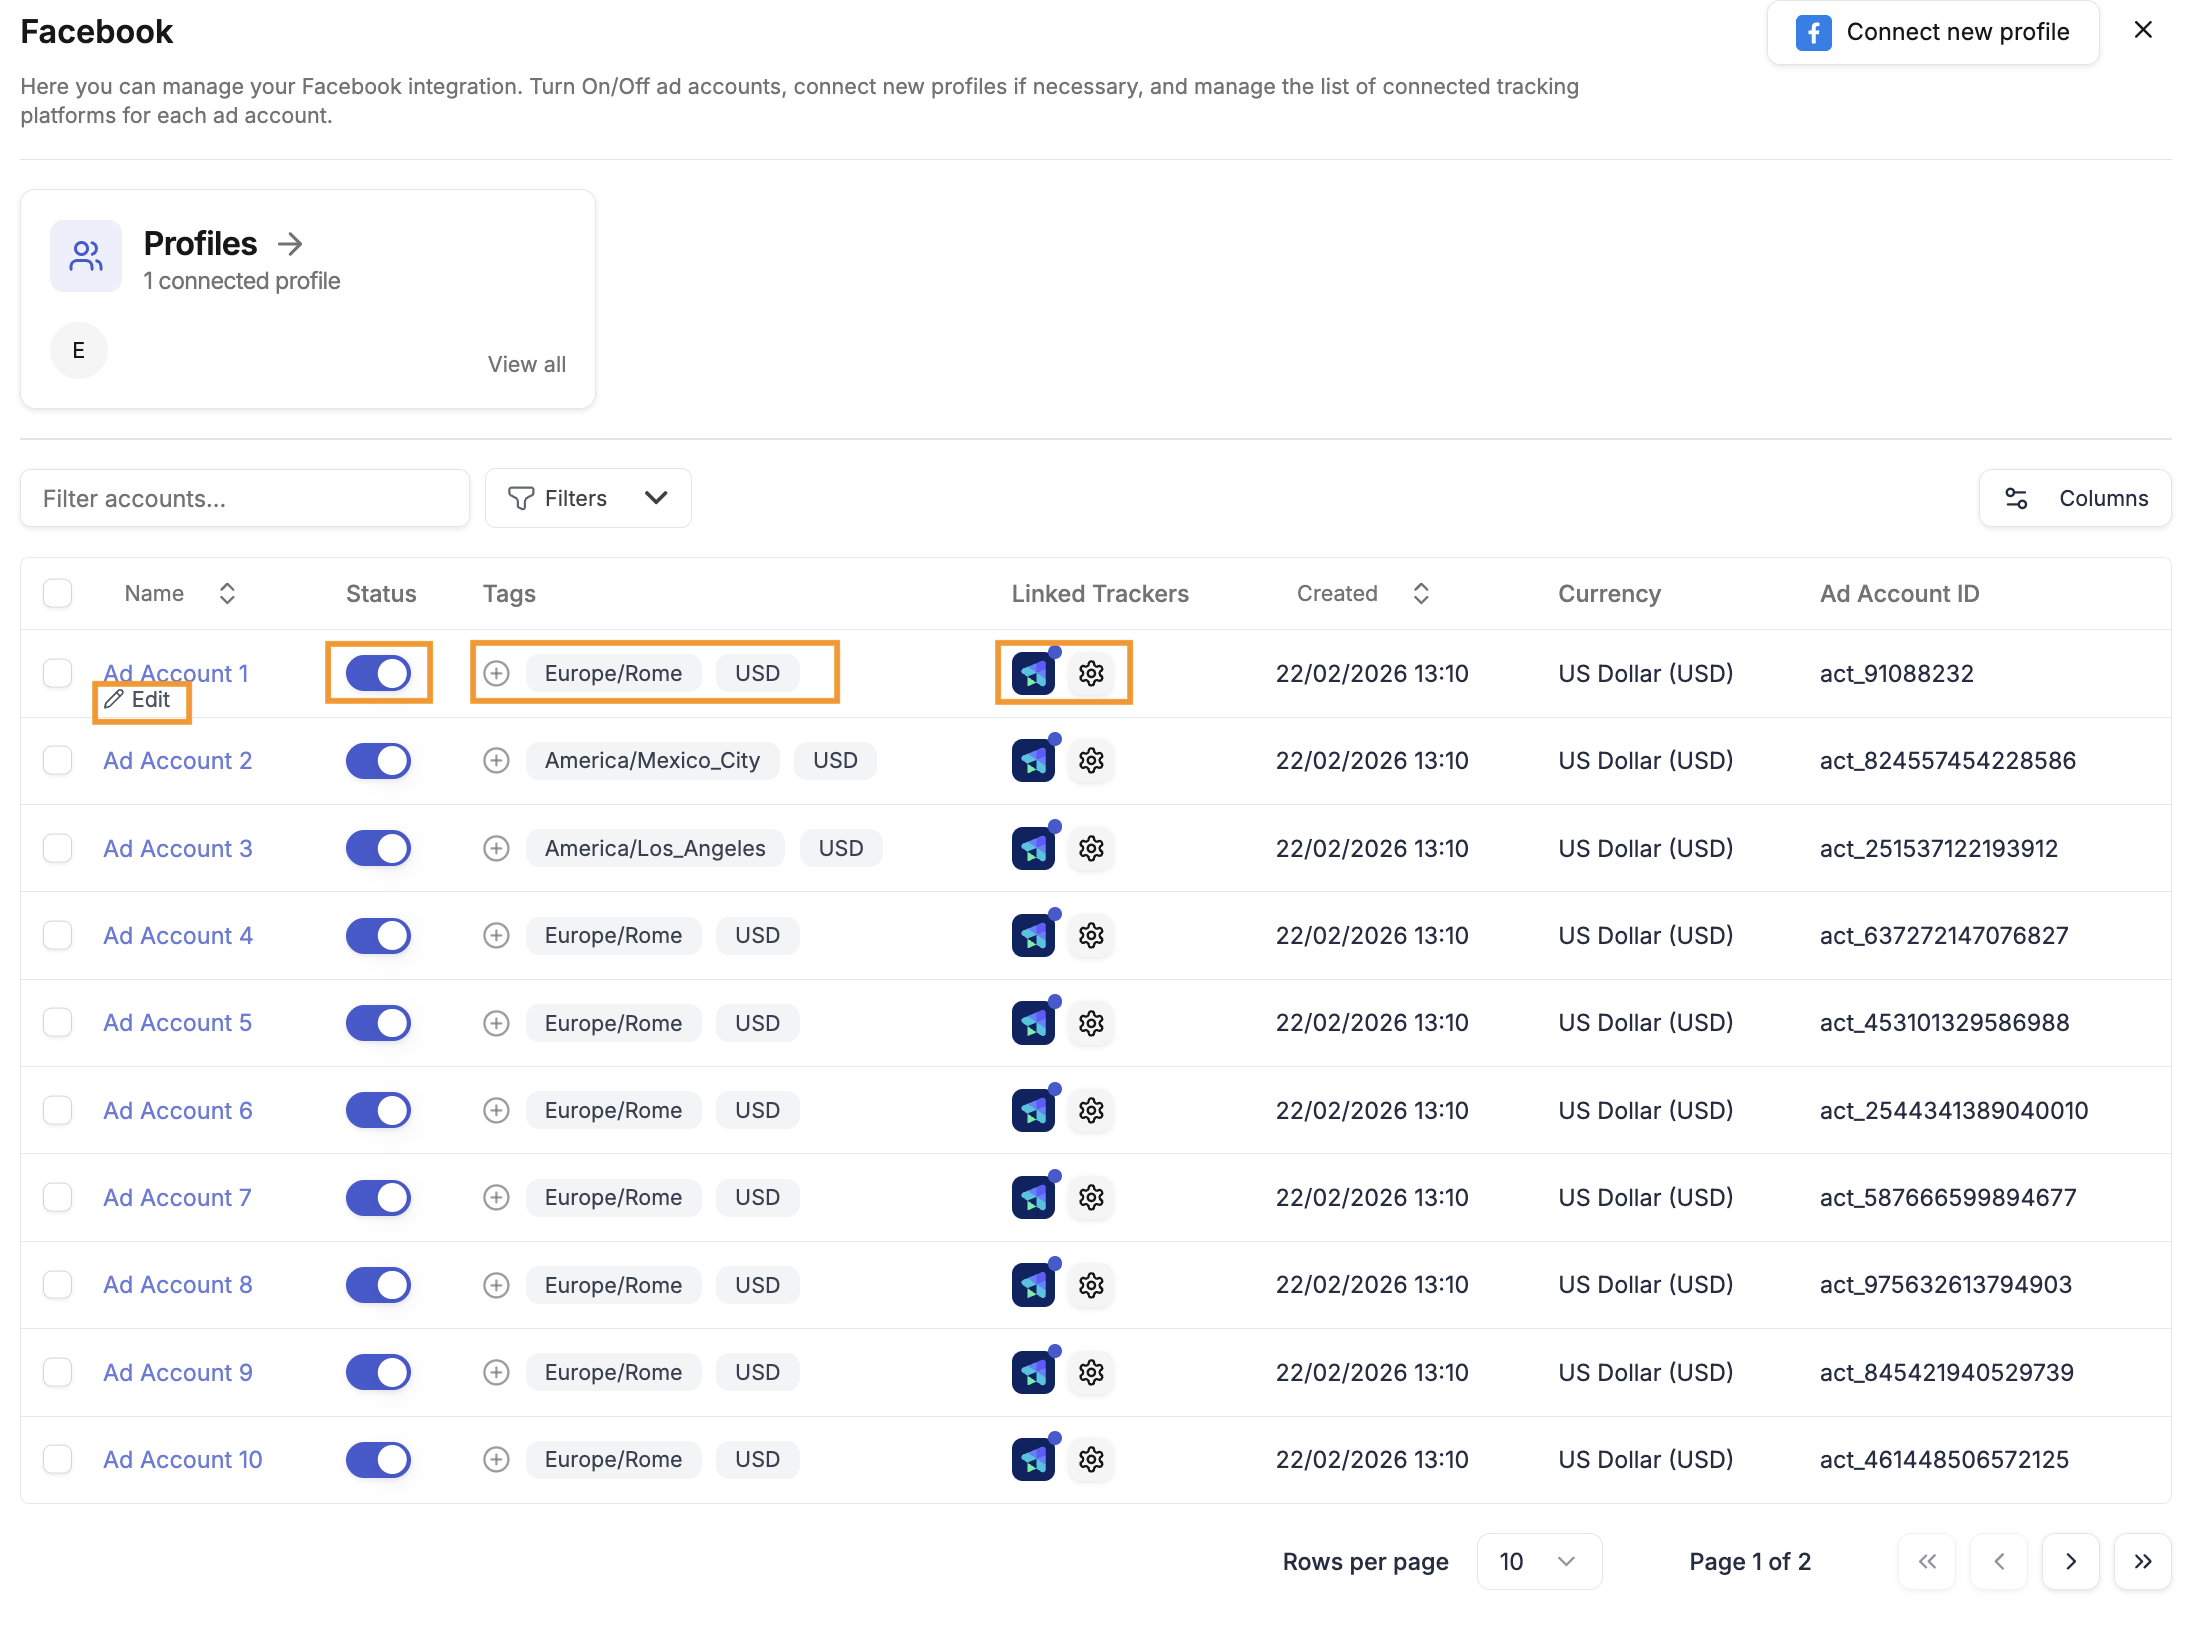
Once an ad network is connected, you can manage the individual ad accounts associated with it. Simply click on the integration to show the list of ad accounts
Changing Profiles Per Account - Edit
Each ad account is associated with a profile — the login or API credential used to access it. You can change which profile is linked to a specific ad account at any time. This is useful when:
- A profile gets banned and you need to switch to a backup login.
- A team member's access changes and you need to reassign their accounts.
- You want to reorganise which credentials manage which accounts.
Enabling and Disabling Accounts - Status
You can pause any ad account at any time. Pausing stops TheOptimizer from syncing data and running automation on that account, but retains all historical data. This is useful if you stop using an account temporarily or want to exclude it from automation without losing its history.
You can pause ad accounts one by one, using the ON/OFF toggle, or in bulk by using the bulk actions that appear at the bottom after you select your ad accounts.
⚠️ Deleting ad accounts is not currently supported. If you need an account removed, contact support. To stop syncing without losing data, use pausing instead.
Adding Tags
Ad accounts can be tagged for organisation purposes. Tags are useful for grouping accounts by client, brand, vertical, or team — making it easier to filter and manage large account lists. Note that some tags are added automatically by TheOptimizer based on account properties (such as timezone or currency), so you may see pre-existing tags when you first open an account.
Customising Tracker Connections Per Account - Linked Trackers
You can also customise tracker settings at the individual ad account level — linking a different tracker, pausing the tracker connection, or editing the tracking template for a specific account — without affecting other accounts in the same integration.
💡 There is no limit on the number of ad accounts you can connect across all networks. Connect as many accounts as you manage.
4. Managing Profiles
Profiles are the authentication credentials TheOptimizer uses to access your ad networks. Depending on the network, a profile is either:
- A login profile — your OAuth-connected account (used for Facebook, Google Ads, TikTok). Stored as a token after you complete the OAuth flow.
- API credentials — an API key and/or secret provided by the ad network (used for all other networks).
Multiple Profiles
You can add multiple profiles to a single ad network integration. This is useful for:
- Team management — each team member can have their own profile linked to the accounts they manage.
- Backup access — if your primary profile gets banned or loses access, a backup profile can take over without downtime.
- Multiple accounts under different logins — if your ad accounts span different Facebook logins, each login can be added as a separate profile.
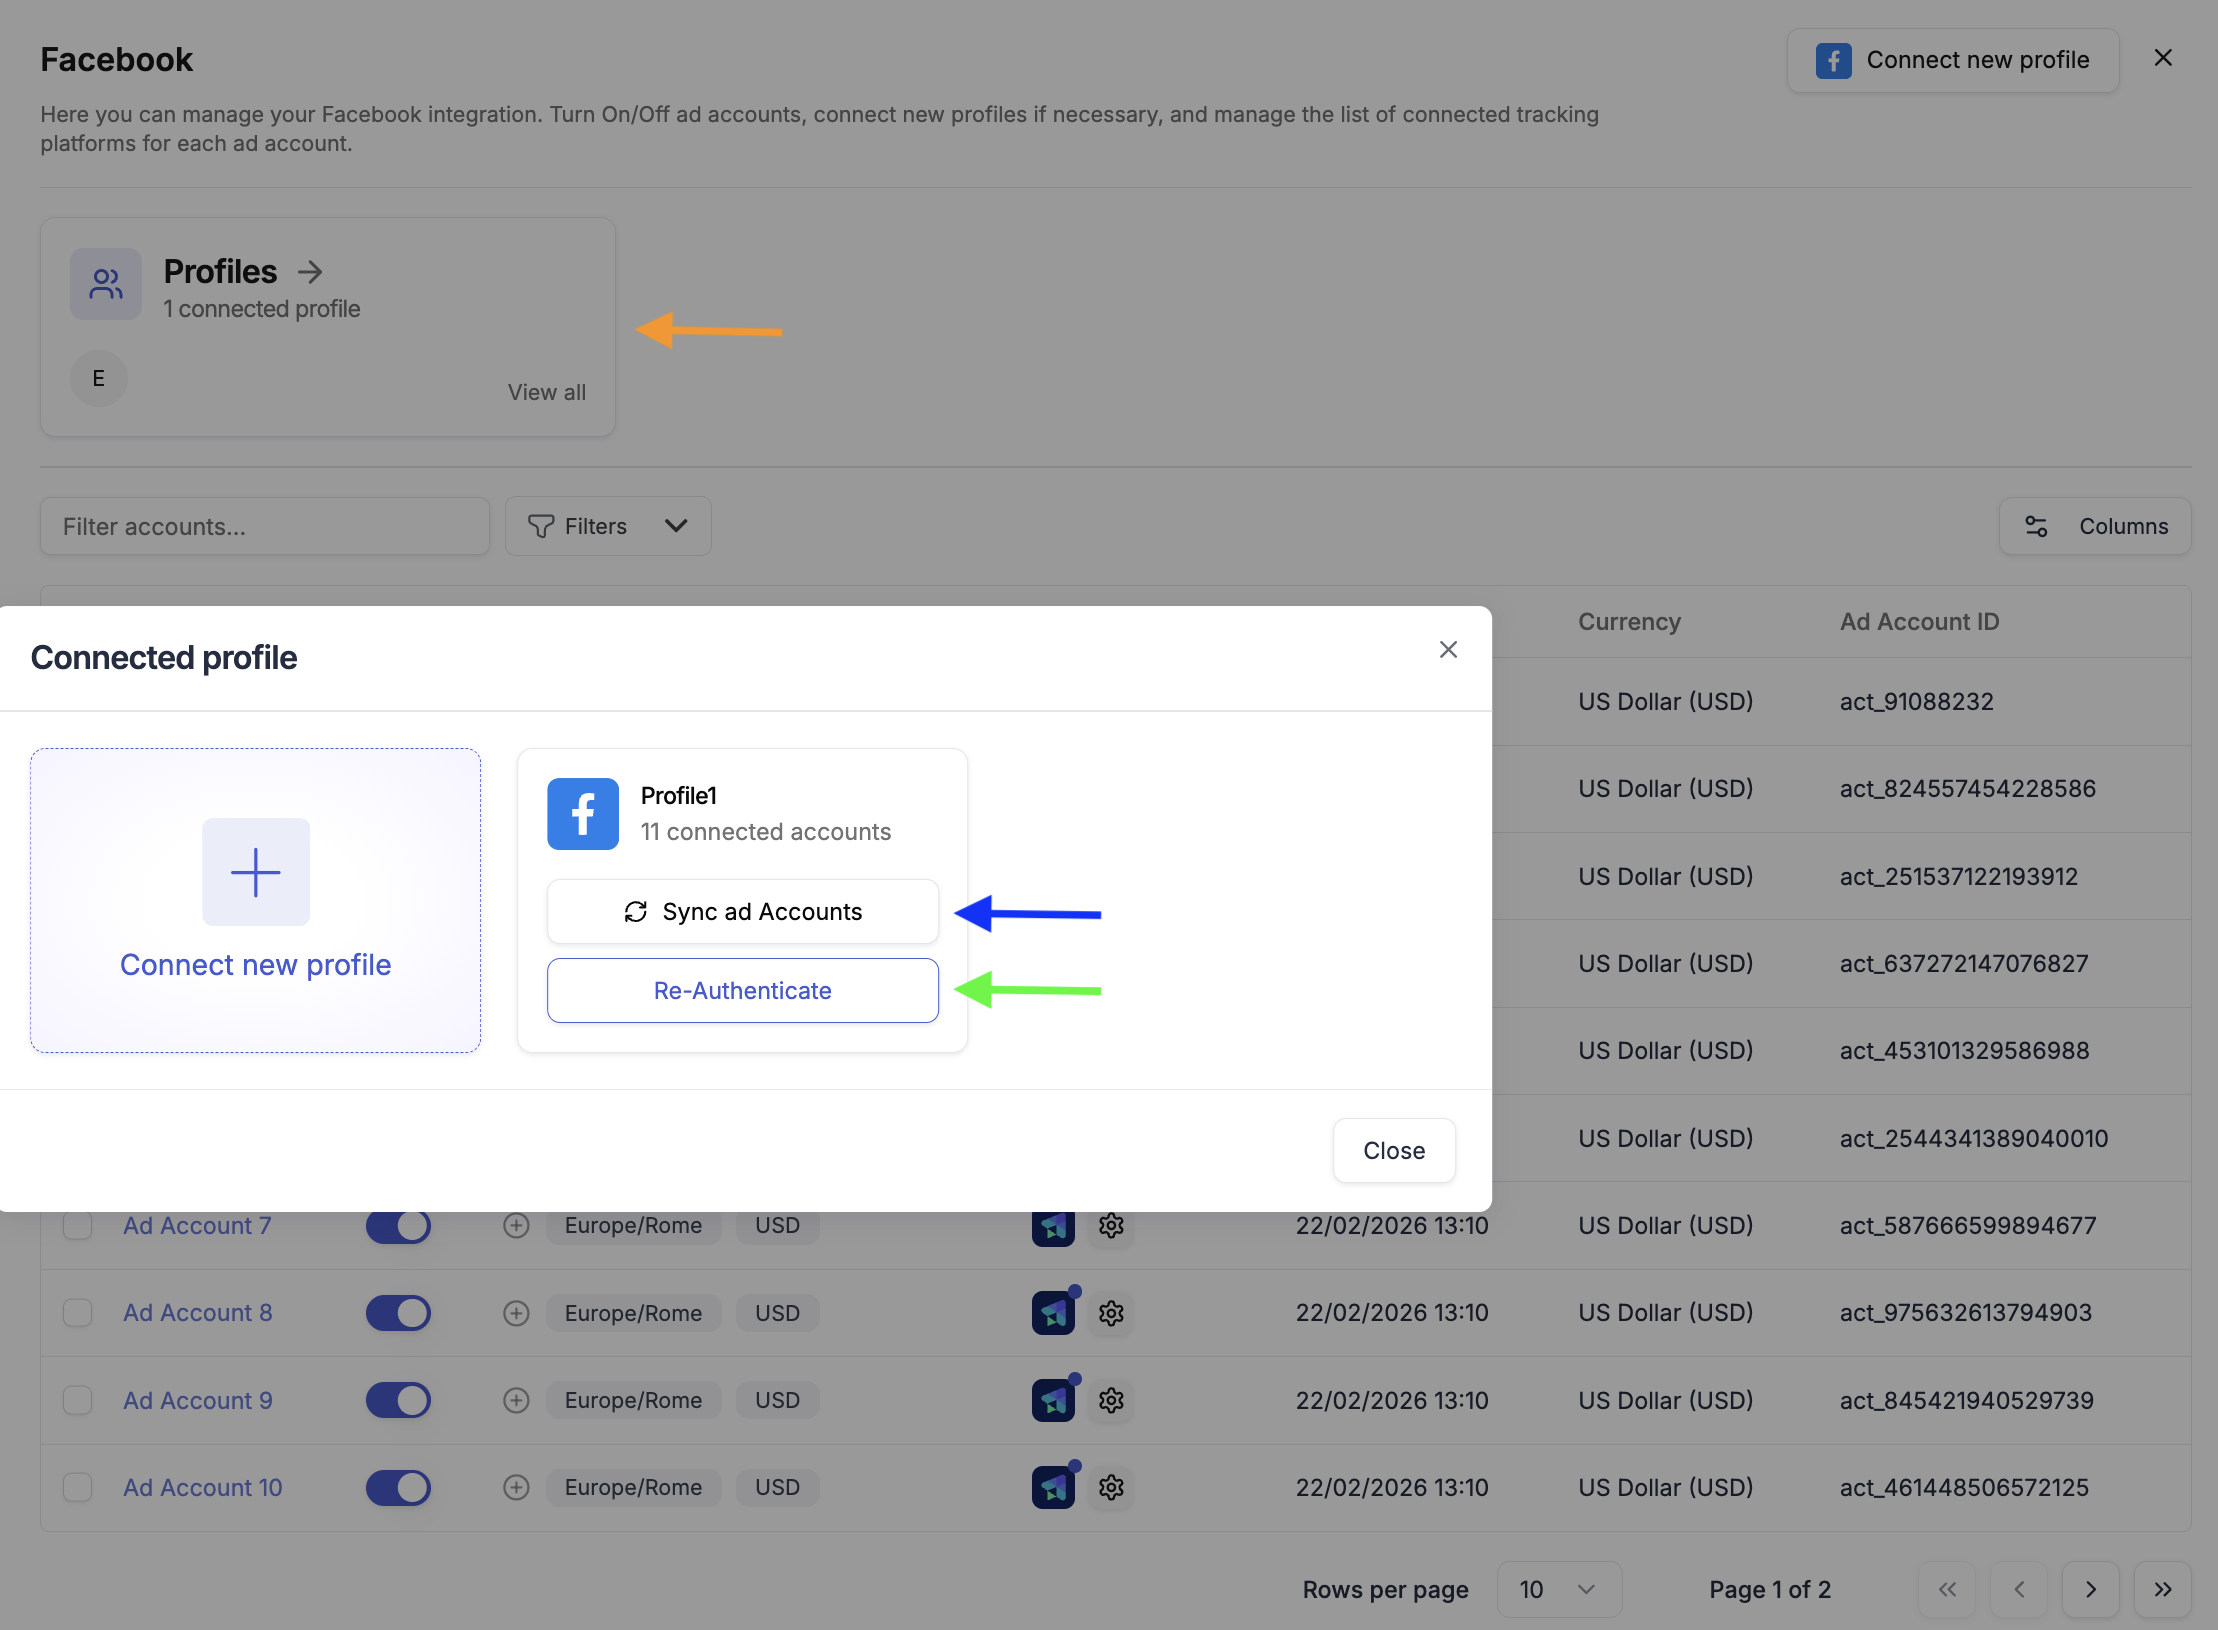
Syncing New Ad Accounts
When you add a new ad account to a network you're already connected to, you can sync from your profile management settings to pull the new account into TheOptimizer without going through the full connection flow again.
Re-authentication
OAuth tokens expire or become invalid when:
- You change your account password.
- The ad network flags suspicious activity and invalidates your session.
- Security settings on your account change.
When this happens, TheOptimizer can no longer sync data or run automation for the affected accounts. You'll need to re-authenticate the profile to restore access. Re-authentication refreshes the token without losing any of your account history or automation settings.
⚠️ You will get email notifications if an account needs re-authentication. Don't ignore them. If a profile becomes invalid and isn't refreshed, all automation and data sync for the accounts under that profile will silently stop. Check your integrations regularly, especially after changing passwords or seeing unexpected drops in data.
5. Connecting a Tracking Platform
Tracking platforms integrate with TheOptimizer to bring in revenue and conversion data alongside your ad network data. This lets the platform match tracker-reported conversions to specific campaigns, ad sets, and ads — and factor that data into your automation rules.
The steps below use ClickFlare as the example. The process is the same for all tracking platforms that use API key authentication.
Step 1 — Enter Your API Credentials
From the Integrations page, click Connect → on your tracking platform. You'll be prompted to enter:
- Integration name — a label for this connection, for your reference only. Use something descriptive like "ClickFlare – Brand A".
- API Key — found in your tracker's settings/API section.
- Currency — the currency your tracker reports revenue in. Make sure this matches your tracker's settings to avoid currency conversion issues.
- Conversion registration time reporting — choose whether conversions are reported at visit time (when the user lands) or postback time (when the conversion fires). This affects how data is matched across time windows.
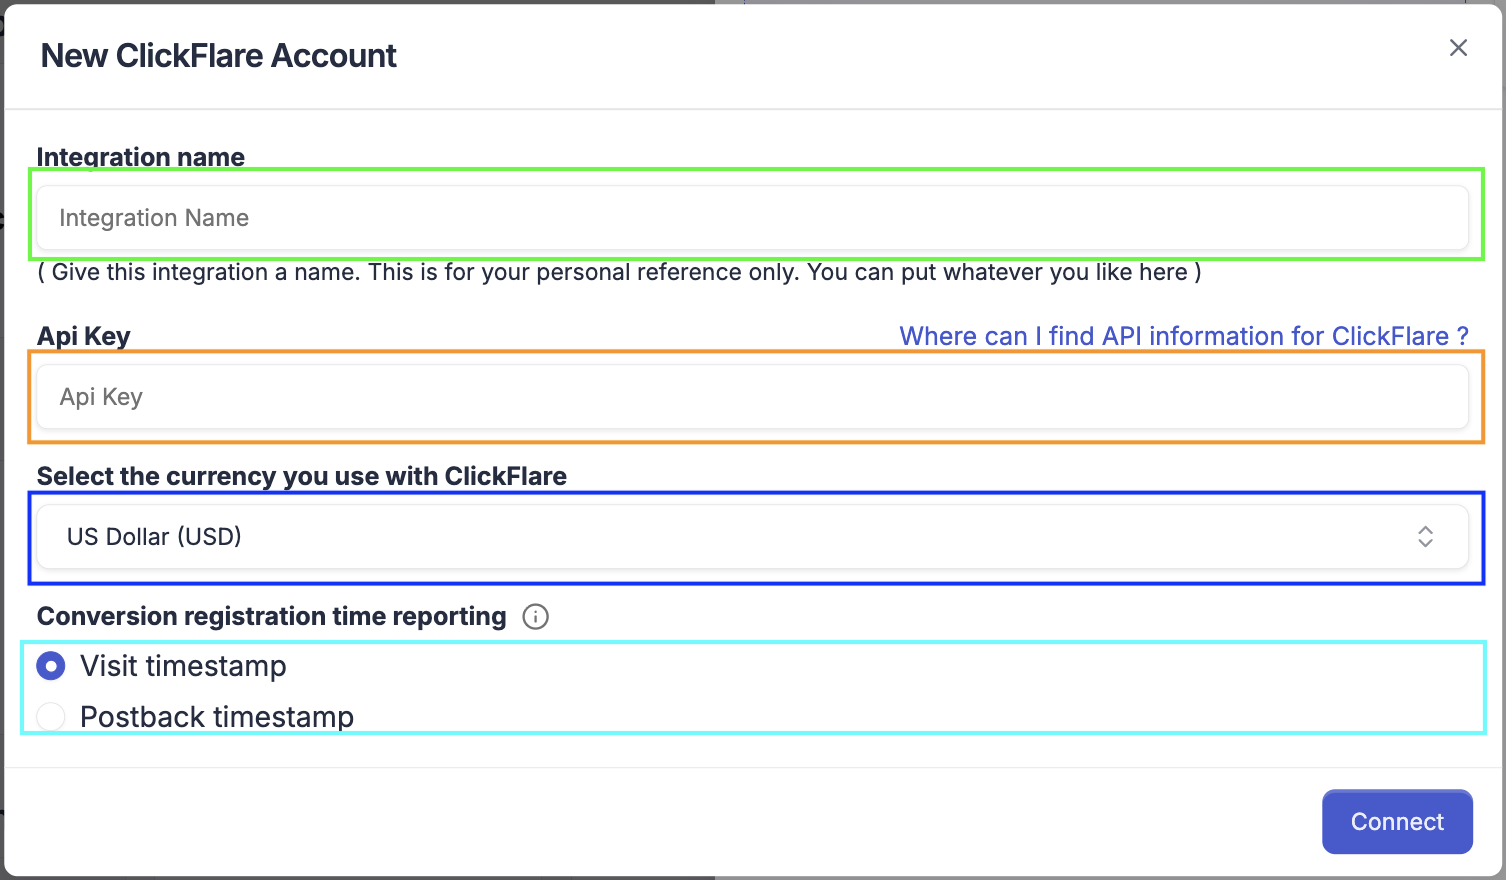
⚠️ For the Currency and Conversion Registration Time make sure to select the same options that you have on the tracking platform. By using different options here from what you have on your tracker will cause data discrepancy between TheOptimizer and your tracker.
Step 2 — Configure the Tracker for Each Ad Network
After connecting, TheOptimizer will prompt you to configure the tracker for each ad network you use. This step tells the platform how to match tracker data to ad network data.
For each ad network listed, click Configure → and select the tracking template that corresponds to the way you've set up your tracker for that network.
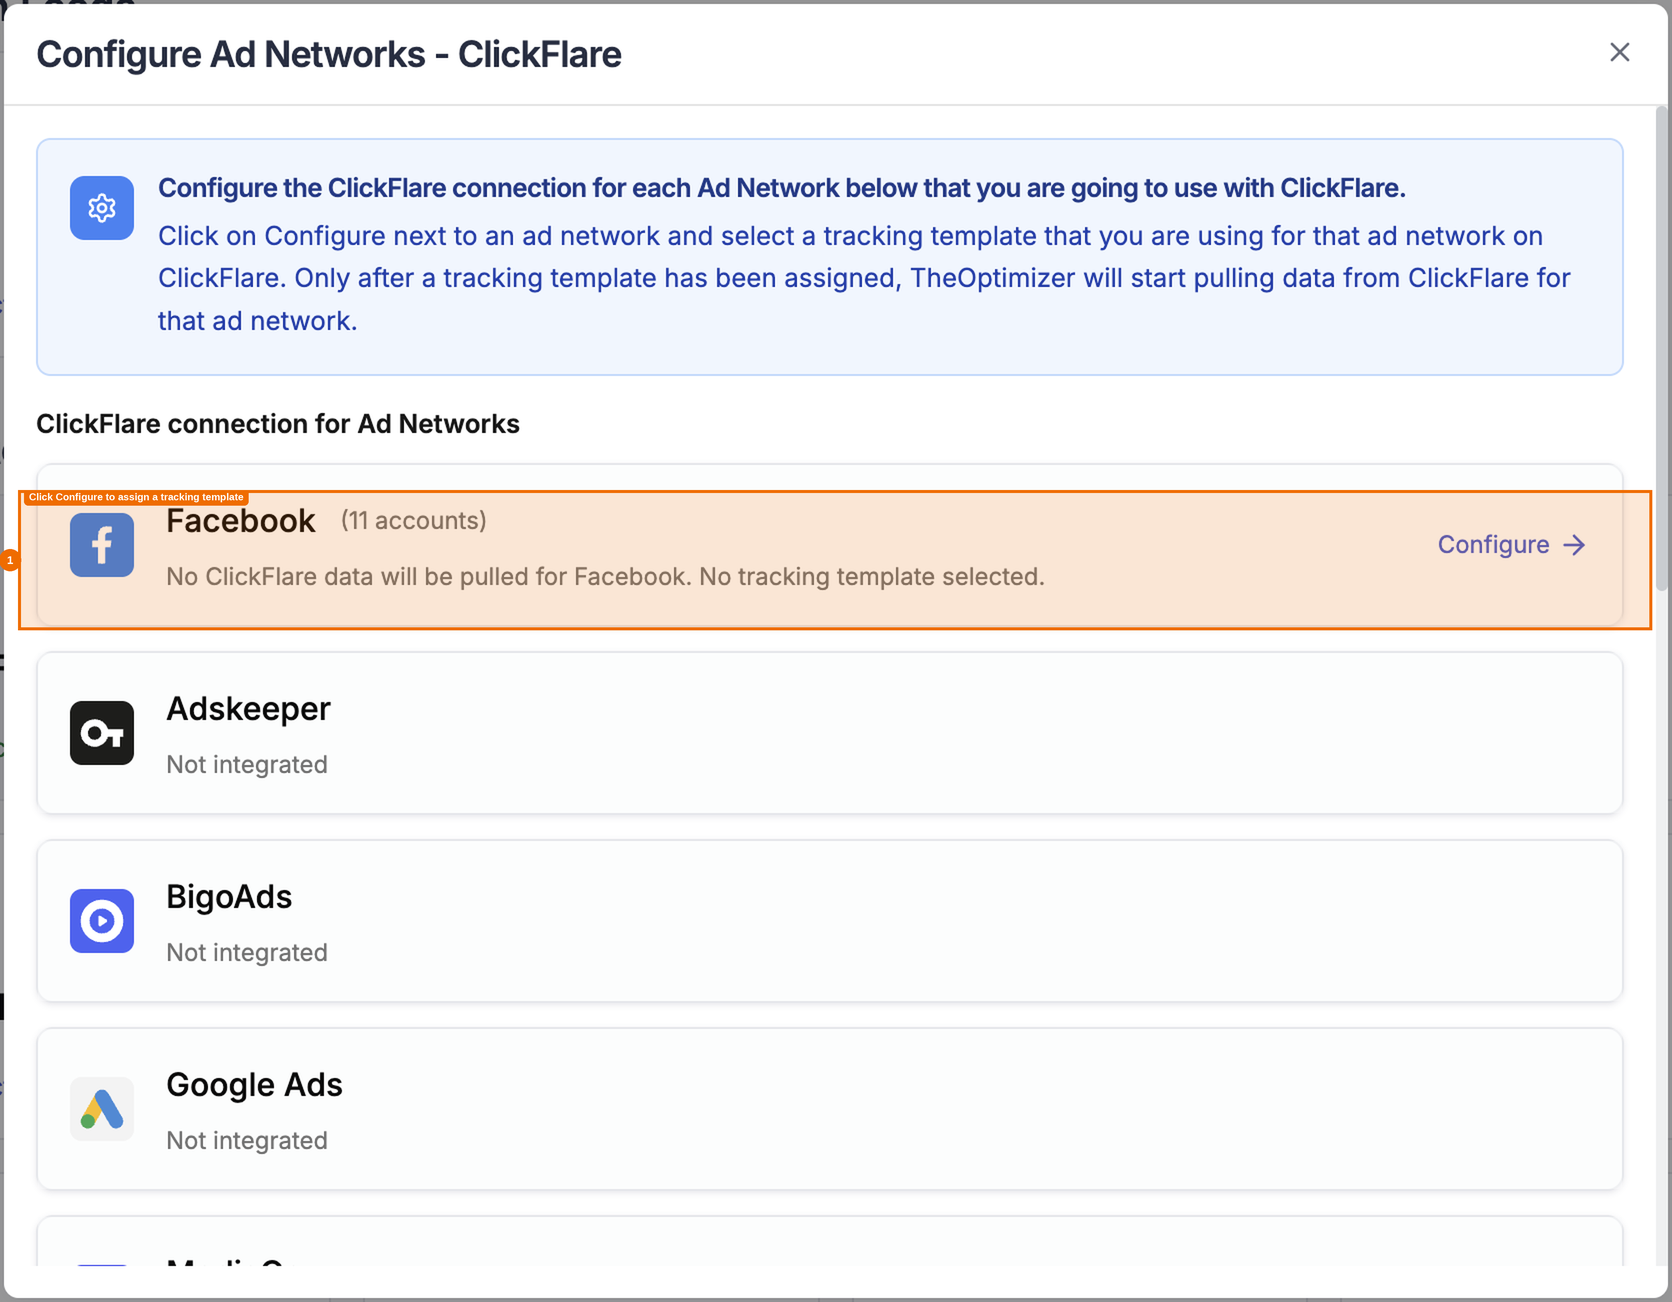
⚠️ No data will be pulled from your tracker for ad networks that are not configured yet.
Understanding Tracking Templates
A tracking template is a set of macros that defines how your tracker reports campaign data for a specific ad network — which tracking param maps to the Campaign ID, which maps to the Ad Set ID, and so on. Usually these templates are called "Traffic Sources" on your tracking platform.
TheOptimizer needs this mapping in order to be able to correctly attribute tracker conversions back to the right campaigns, adsets, ads and other dimensions.
The "Chose a tracking template" dropdown select will show all the available tracking templates (Traffic Sources) that you have set up on your tracker. Select a tracking template from the list.
This will become the default tracking template that is going to be used for all ad accounts of the ad network.
Most users won't need to modify templates. The default templates for each major tracker cover the standard macro setup. However, if you're using a non-standard setup or a specialised provider like a search feed, you may need to create a custom template.
Creating a new template can be done from the Actions menu.
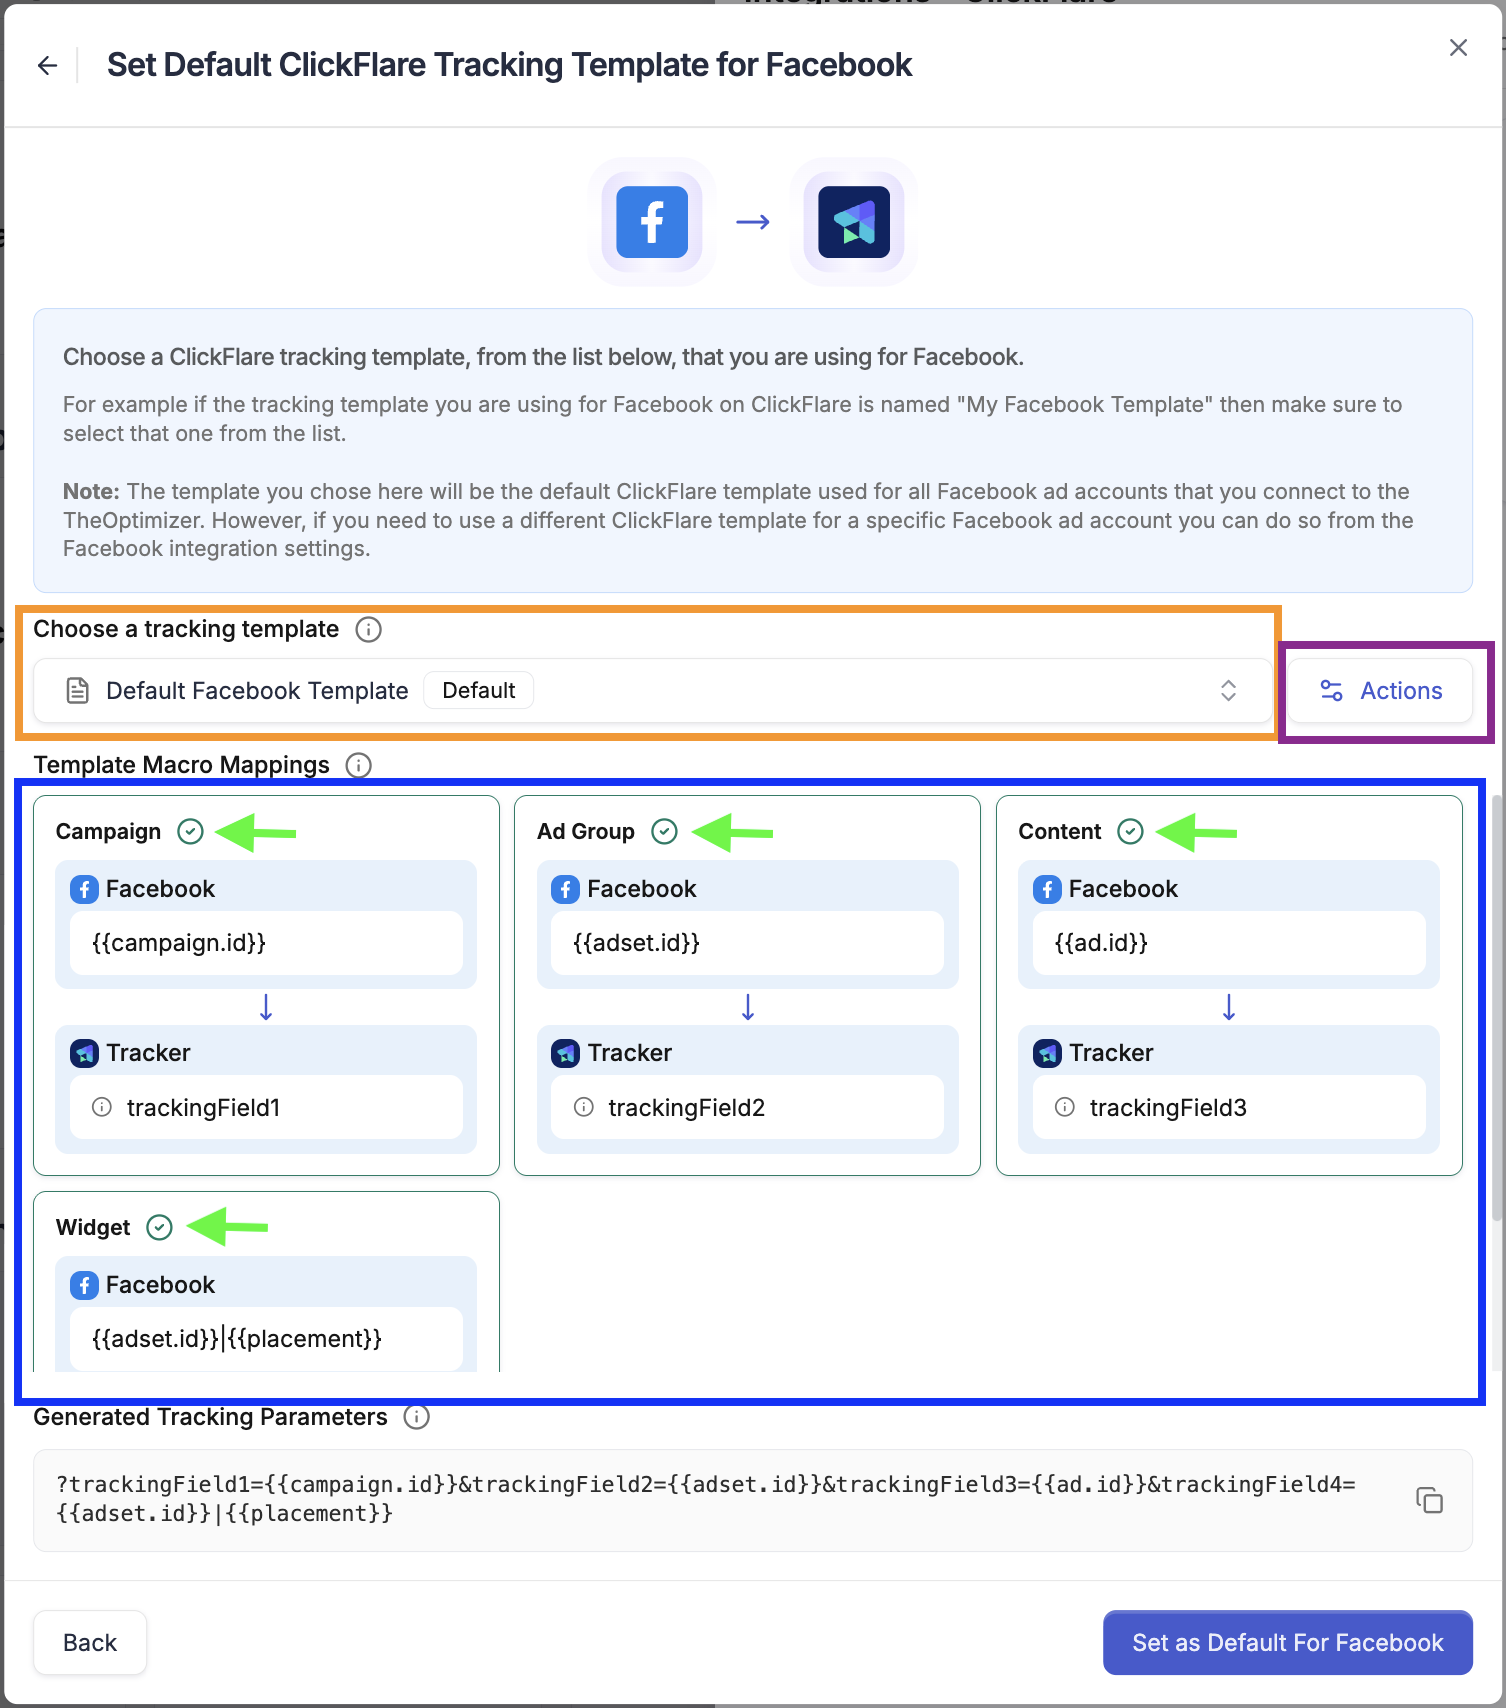
⚠️ Required macros: For a template to work, it must include mappings for Campaign ID, Ad Set ID, Ad ID, and Placement. If any of these are missing (not showing the checkmark), TheOptimizer will flag the issue and you'll need to fix the template in your tracker before proceeding.
Step 3 — Confirm the Connection
Once a tracking template is selected for an ad network, the connection status will update to Connected.
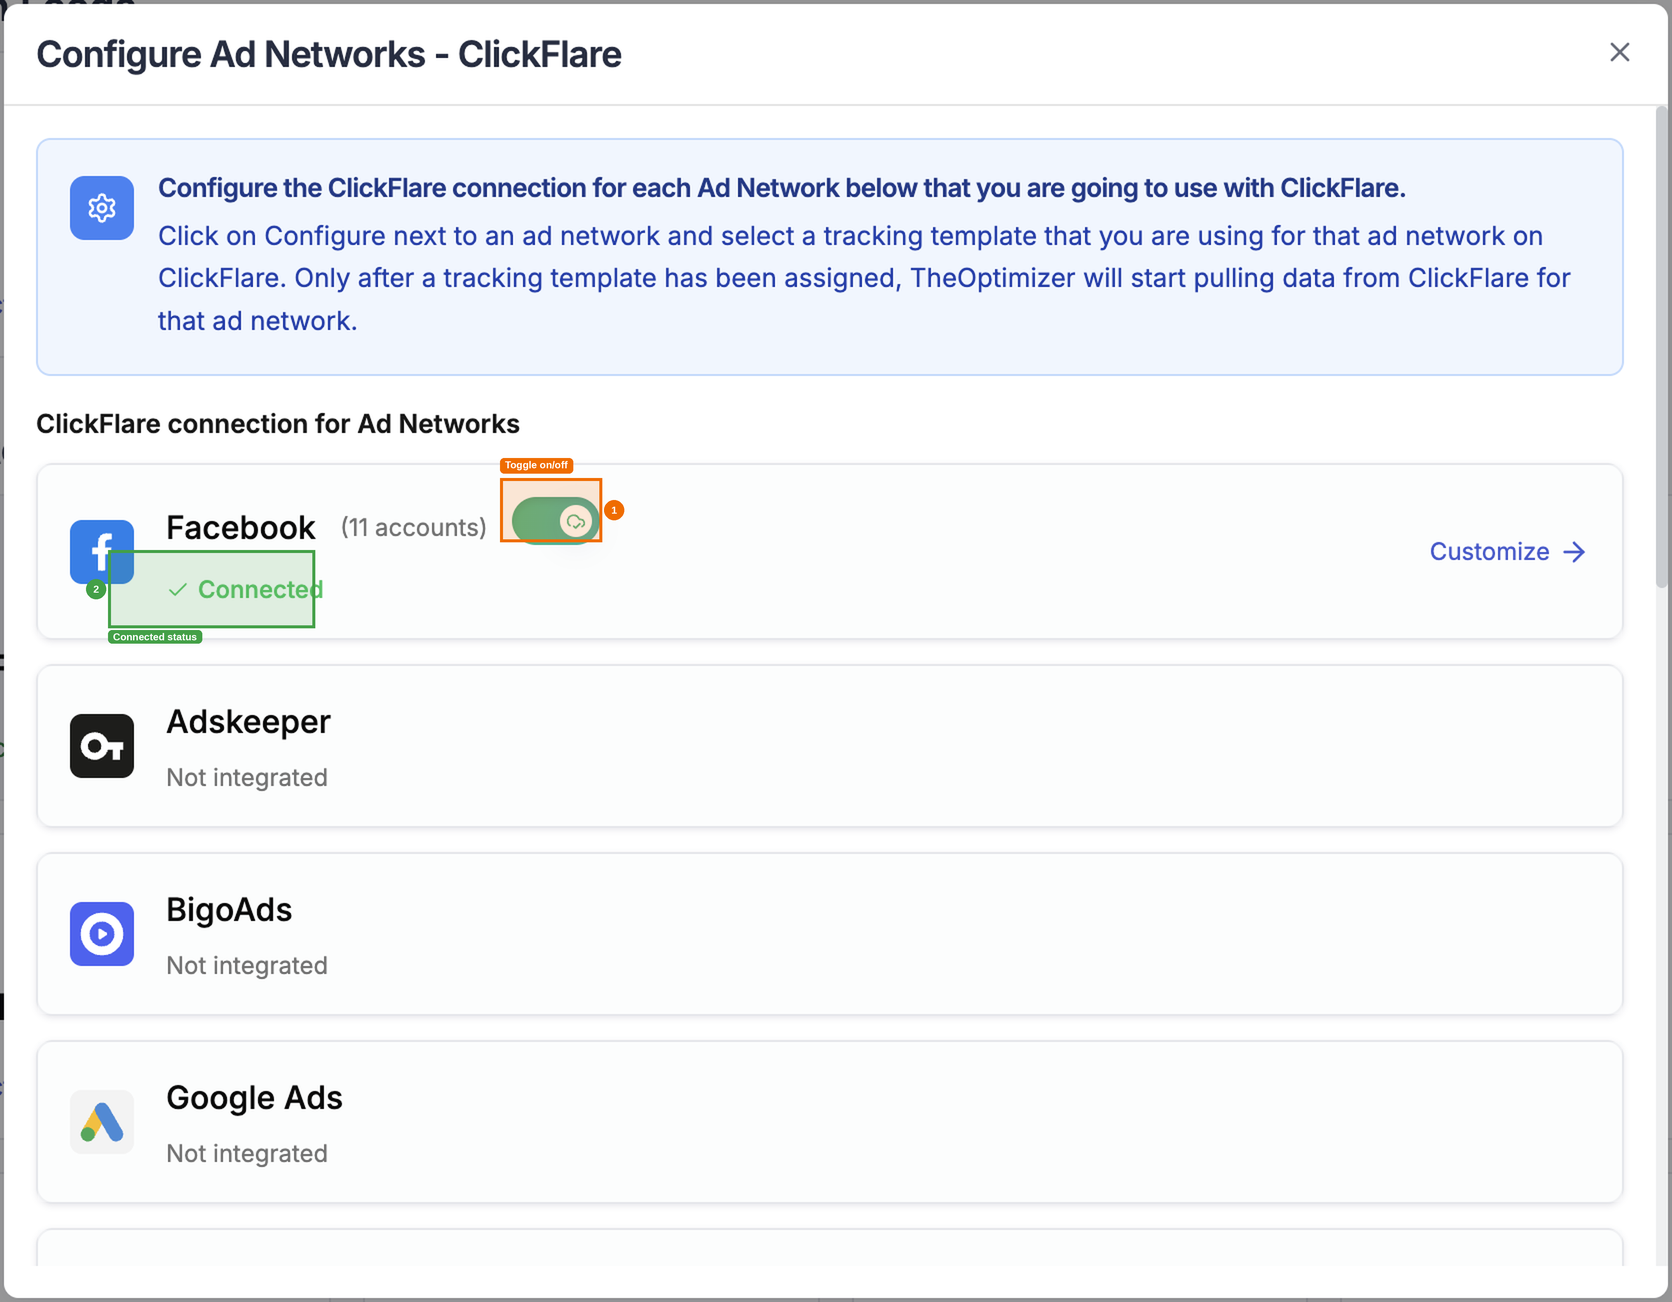
⚠️ Turn Off the connection If you want to stop receiving data from your tracker for a specific ad network.
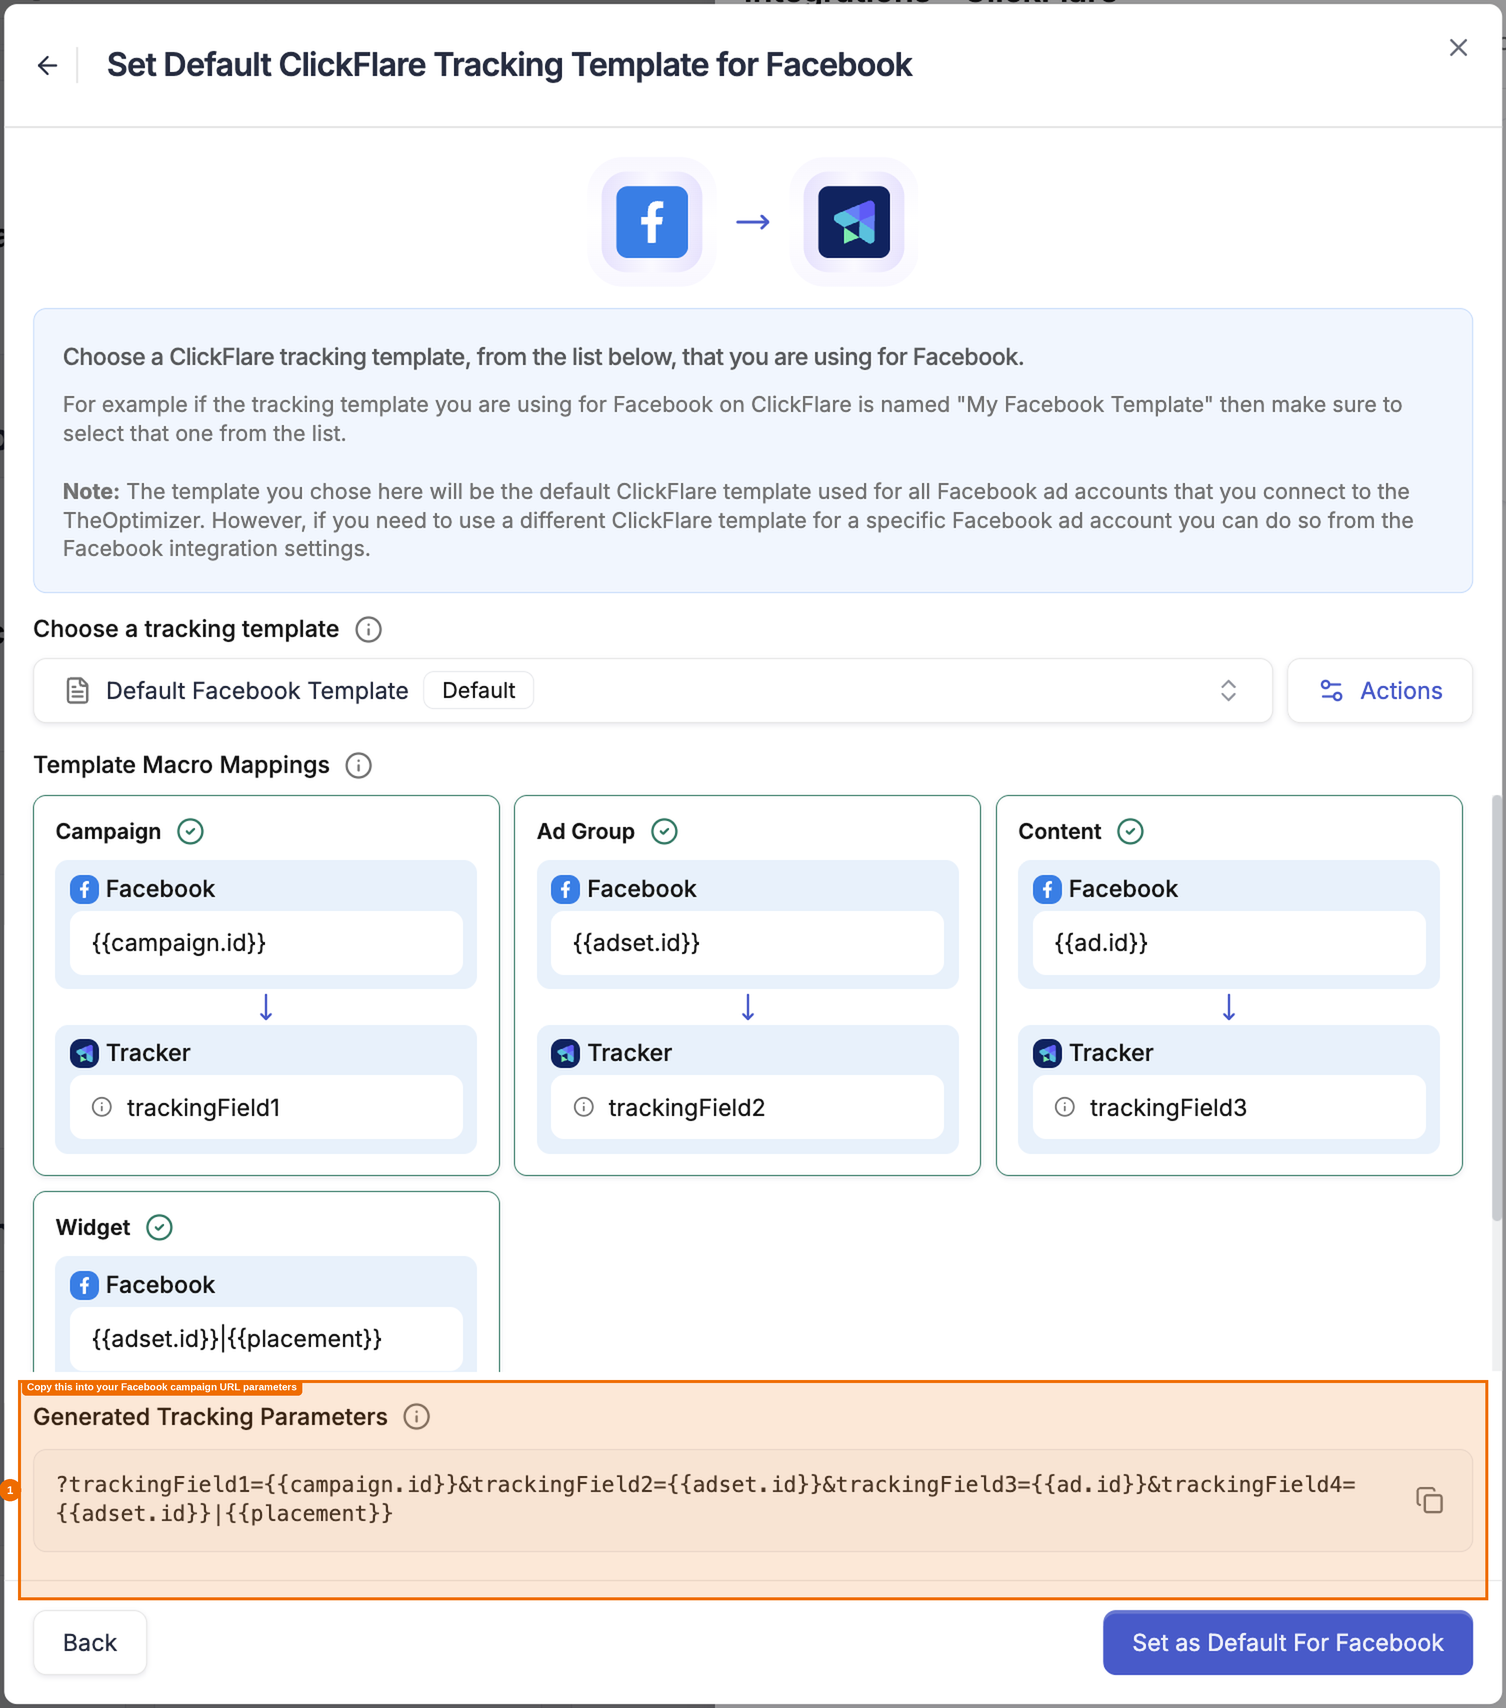
Step 4 — Add Tracking Parameters to Your Campaigns
Usually you should have already done this when creating the campaigns on the ad network.
In case you have not, this is a reminder to let you know that you need to make sure to always have the generated tracking parameters code added to your campaigns. This code is what enables the tracker to receive the correct campaign/ad data and report it back to TheOptimizer.
ℹ️ Without the tracking code added to your campaigns, the tracker will receive visits but won't be able to match them to your campaigns — meaning also that no conversion or revenue data will flow into TheOptimizer.
ℹ️ The One Tracker Per Campaign Rule
Only one instance of a tracker type should track any individual campaign at a time. Using two trackers instances of the same type (i.e two ClickFlare trackers) on the same campaign is not supported and it causes conflicts in data matching and attribution.
However, running multiple different tracker types simultaneously on the same campaign is fine — for example, using ClickFlare for affiliate attribution while also tracking the same campaign in Google Analytics.
6. Connecting Google Analytics 4
Why Connect GA4?
If you are already running campaigns with a click-tracking platform (like ClickFlare or Voluum) and also using Google Analytics 4 to track on-site user behaviour — sessions, session duration, bounce rate, engagement rate, and so on — you can bring those GA4 metrics into TheOptimizer alongside your ad network and tracker data.
This gives you a unified view in one place: ad network spend and delivery metrics, tracker-reported conversions and revenue, and GA4 behavioural metrics, all in the same dashboard and available to your automation rules.
ℹ️ GA4 and a tracker can run side by side. It is completely fine to have both a tracking platform (e.g. ClickFlare) and Google Analytics 4 connected to the same ad account simultaneously. TheOptimizer keeps their metrics in separate column sets — tracker metrics appear in their own columns and GA4 metrics in their own columns. You can display both together in a single view by selecting the relevant columns, and you can use metrics from either platform when building automation rules.
Step 1 — Add the GA4 Integration
From the left-hand menu, go to Integrations, scroll down to the Analytics & Reporting section, and click Connect on the Google Analytics 4 card.
Click Connect New Account, then give the integration a name. This name is purely for your own reference — use something that identifies which GA4 account or property group this connection belongs to.
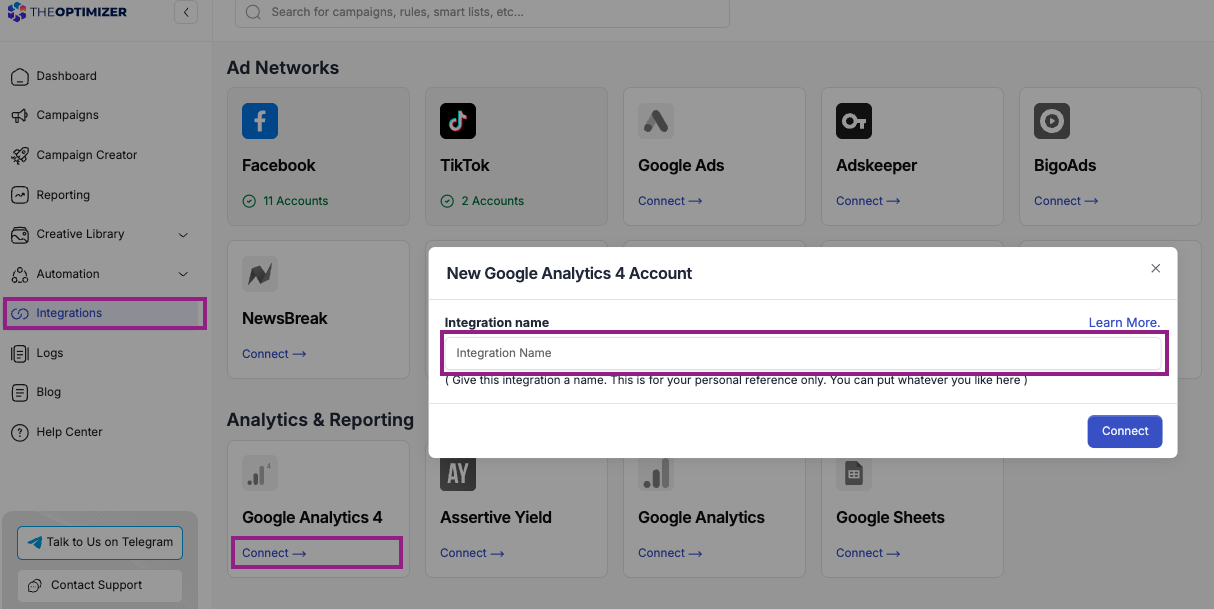
Click Connect. This launches the Google authorisation flow — log in with the Google account that has access to your GA4 properties and click Continue to grant TheOptimizer the required permissions.
Once authorised, you will be redirected back to TheOptimizer with a success message. At this point, the connection has been established, but there is a required second step before data will actually flow.
<SCREENSHOT>
⚠️ The integration is not complete after authorisation alone. You have authorised TheOptimizer to access GA4, but you still need to link the integration to your ad accounts. Continue to Step 2.
Step 2 — Link GA4 to Your Ad Accounts
The GA4 integration needs to be linked to ad networks (ad accounts) before TheOptimizer can start pulling data — the accounts whose campaign data you want to correlate with GA4 data.
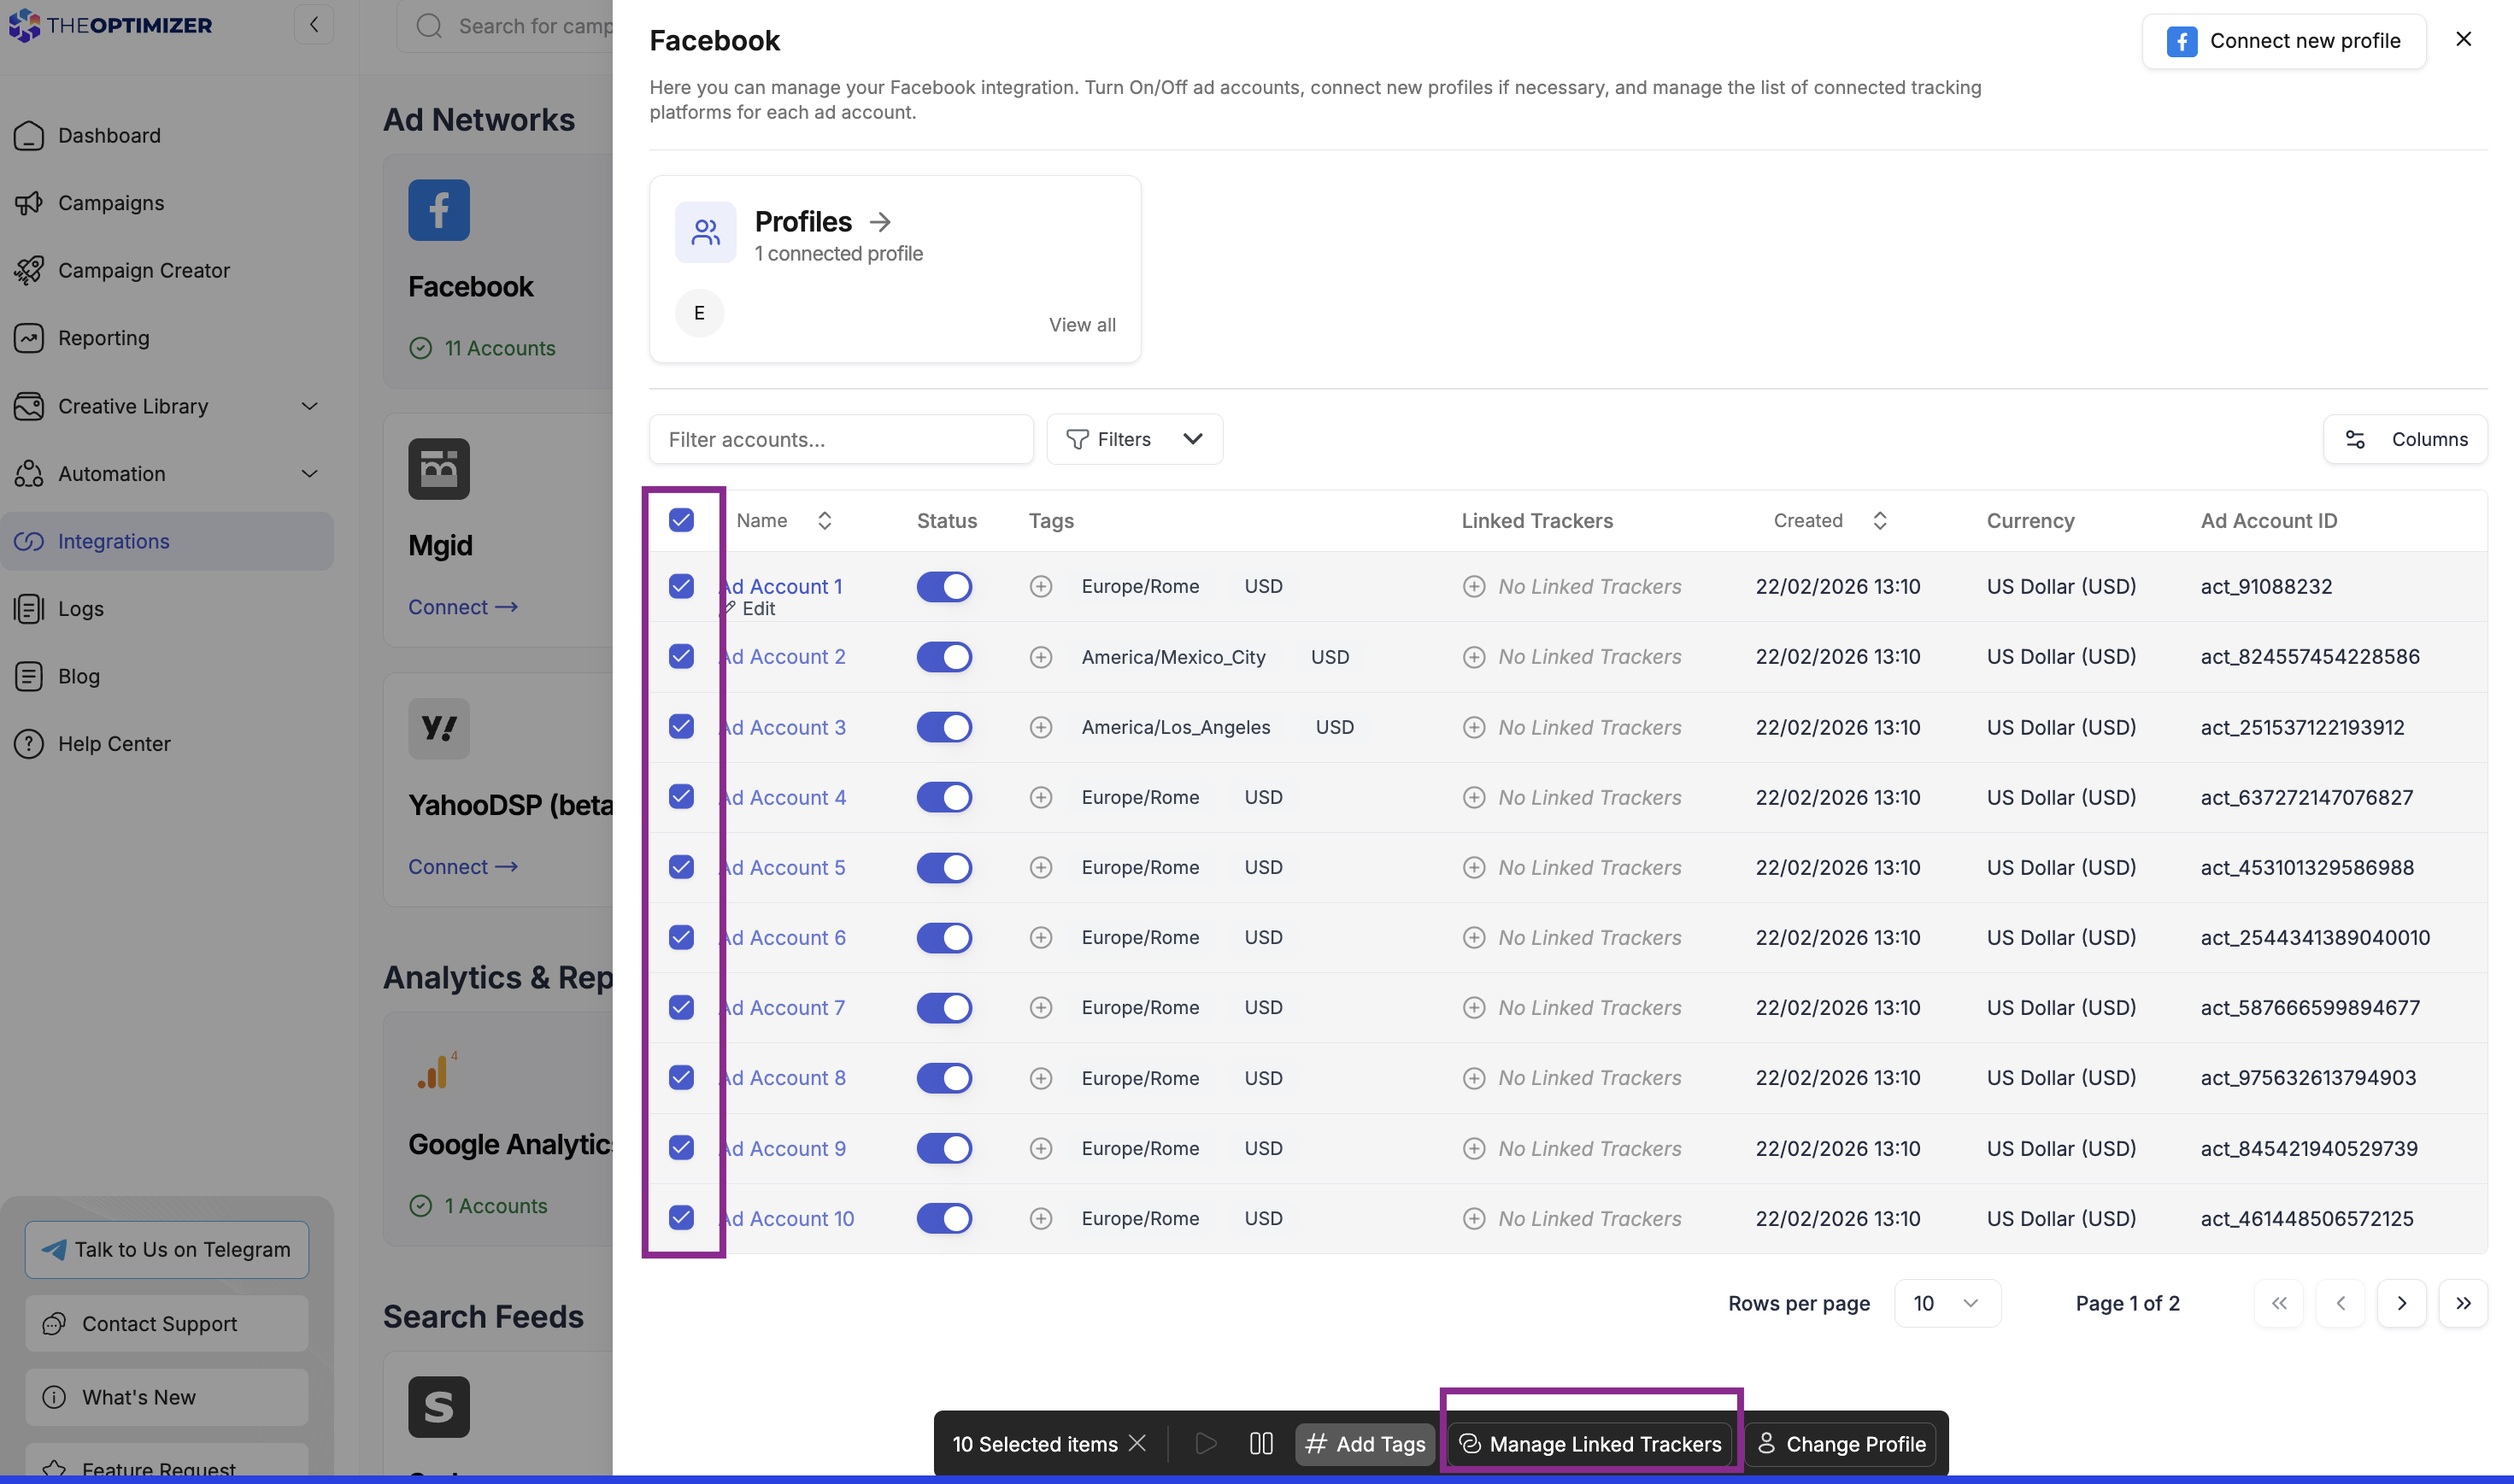
Go back to the Integrations page, open your Ad Networks section, and click on the ad network whose campaigns you are tracking with GA4. For example, if your Facebook campaigns are what you're tracking in GA4, click on Facebook.
Select one or more ad accounts you want to link. Once selected, a floating action menu will appear at the bottom of the screen. Click Manage Linked Trackers.
In the dialog that appears, click Connect Tracking Platform and choose the GA4 integration you just added from the list of available integrations.
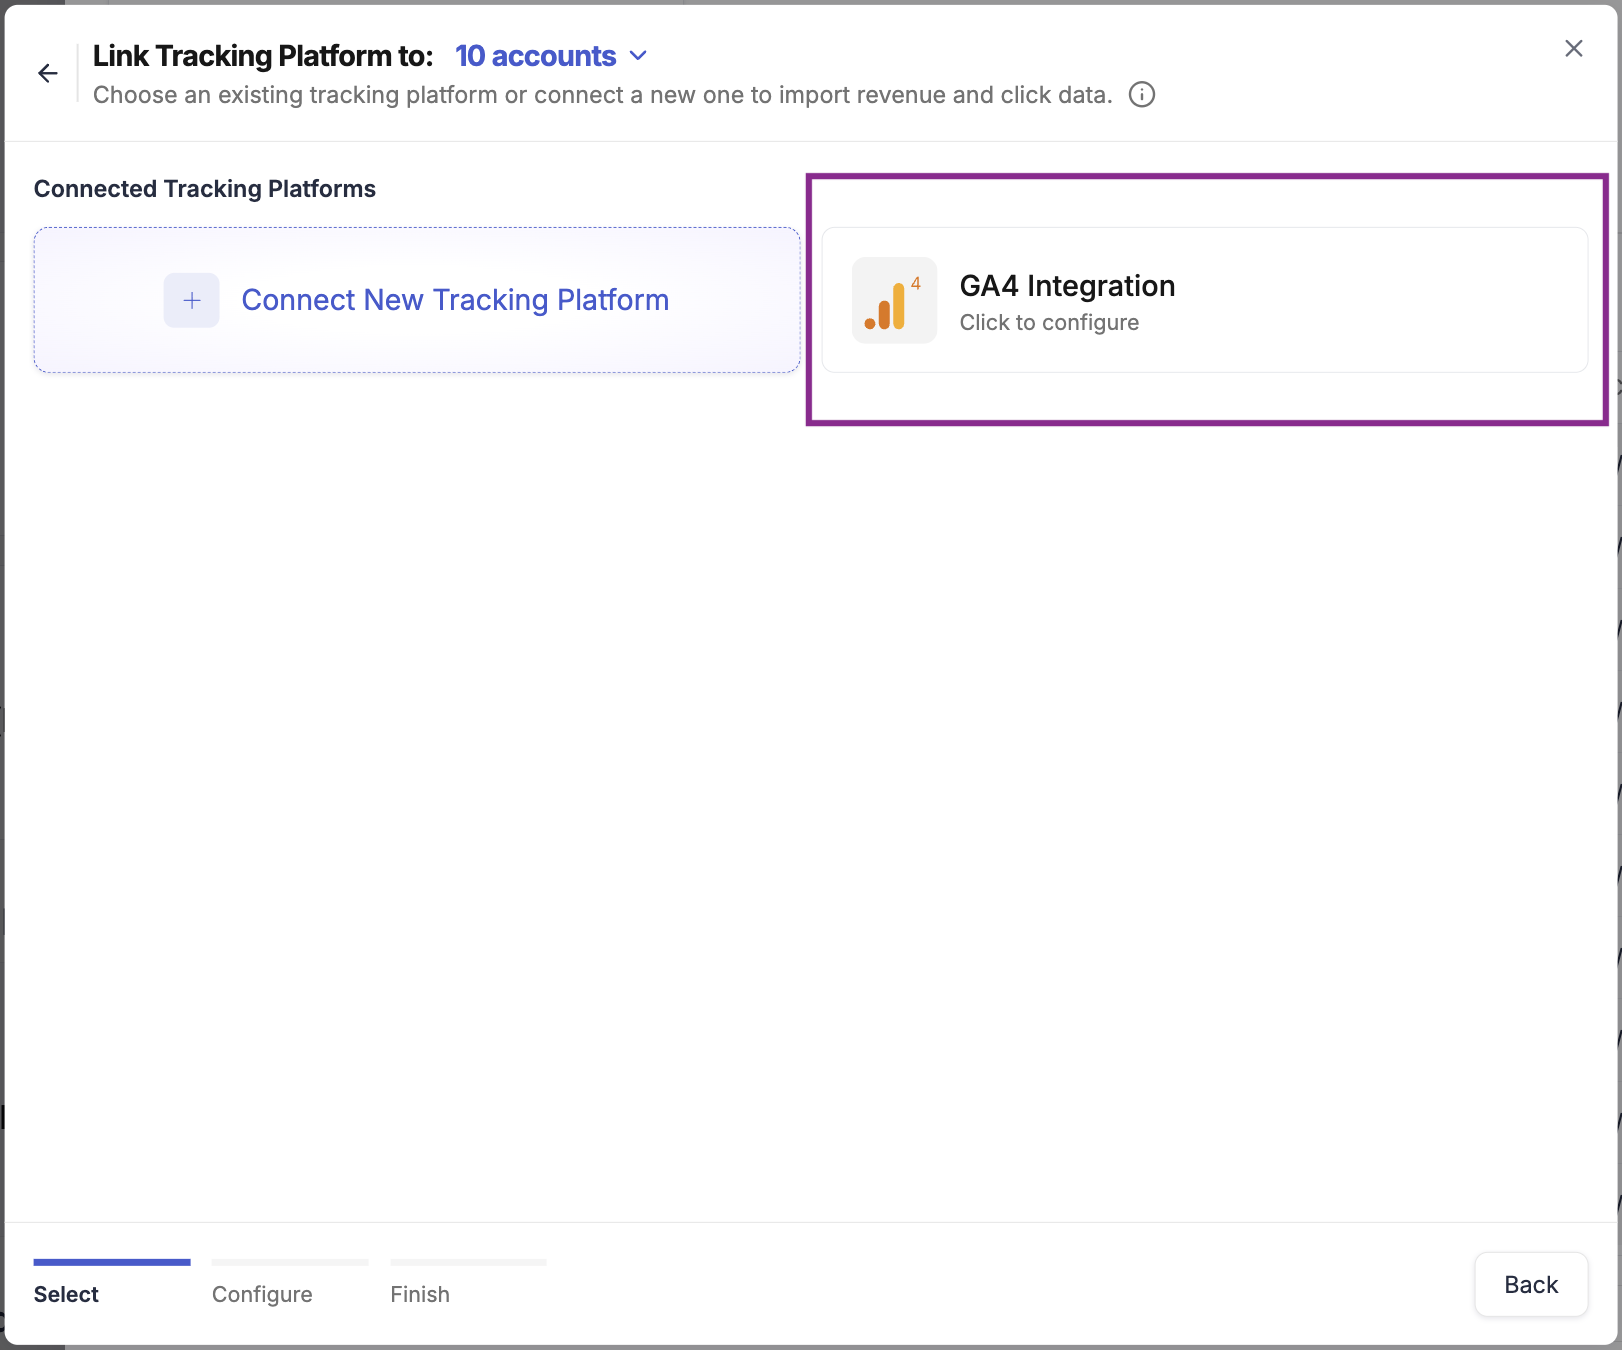
💡 If the GA4 integration does not appear in the list immediately, refresh the page and navigate back to the ad account selection. It should appear after a refresh.
Step 3 — Add a GA4 Property
After selecting the GA4 integration, a configuration dialog will open. Click Add Analytics Property.
A Google Analytics property is a site profile in GA4 — one property typically represents one website or product. You may have access to multiple properties across different accounts.
In the dialog:
- Select an account — choose from the GA4 accounts accessible via the Google profile you used during authorisation.
- Select a property within that account — the specific site whose data you want to use.
Step 4 — Select Metrics to Import
After selecting the property, you'll see a list of available GA4 metrics. Choose which metrics you want to import into TheOptimizer.
Some metrics are pre-selected by default — these are the most commonly used ones. You can customise the selection freely: click Add more metrics to search for and add additional metrics, or deselect any that you don't need.
⚠️ There is a hard limit of 60 metrics across all your GA4 integrations combined. This limit applies to the total number of distinct metrics imported from all properties and all GA4 connections. Once you reach 60, you cannot add more.
Plan your selection carefully. If you are likely to add more GA4 properties in the future, leave room in your quota. Avoid importing every available metric — import only the ones you will actually use in your views or automation rules.
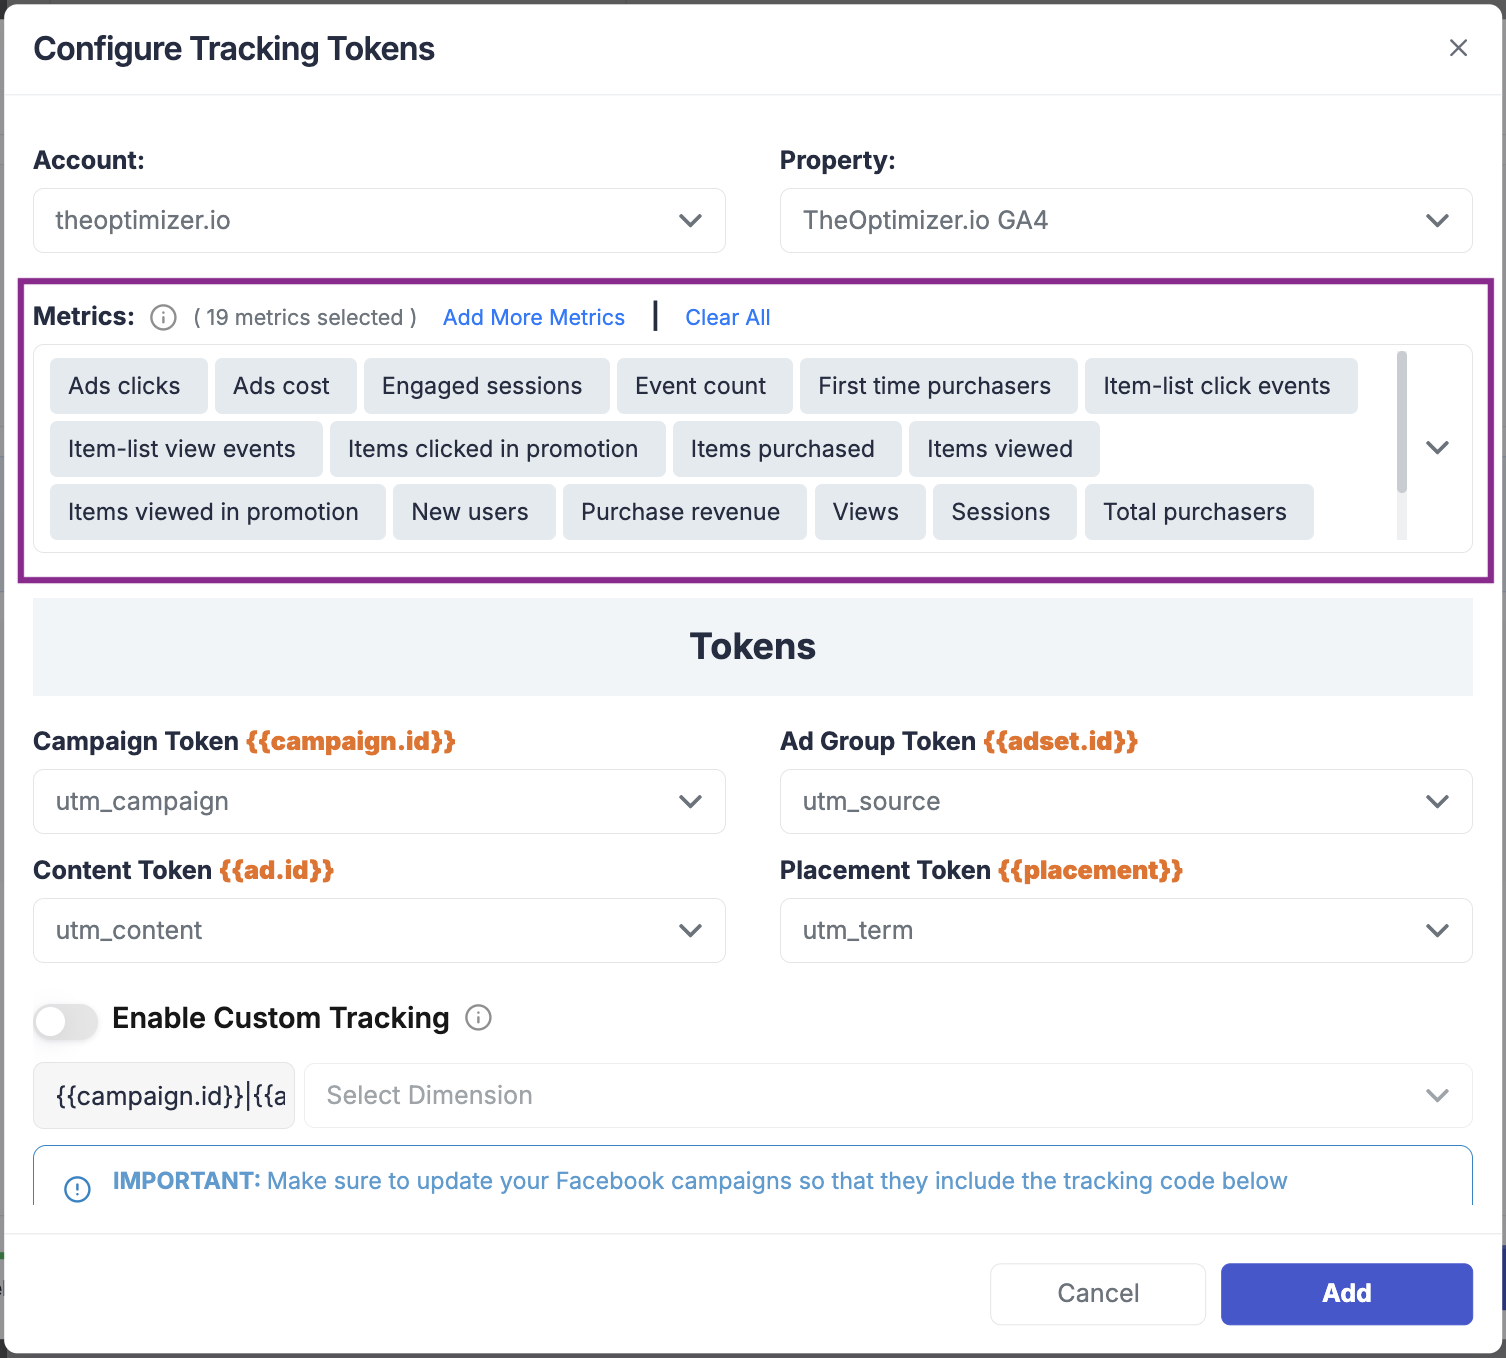
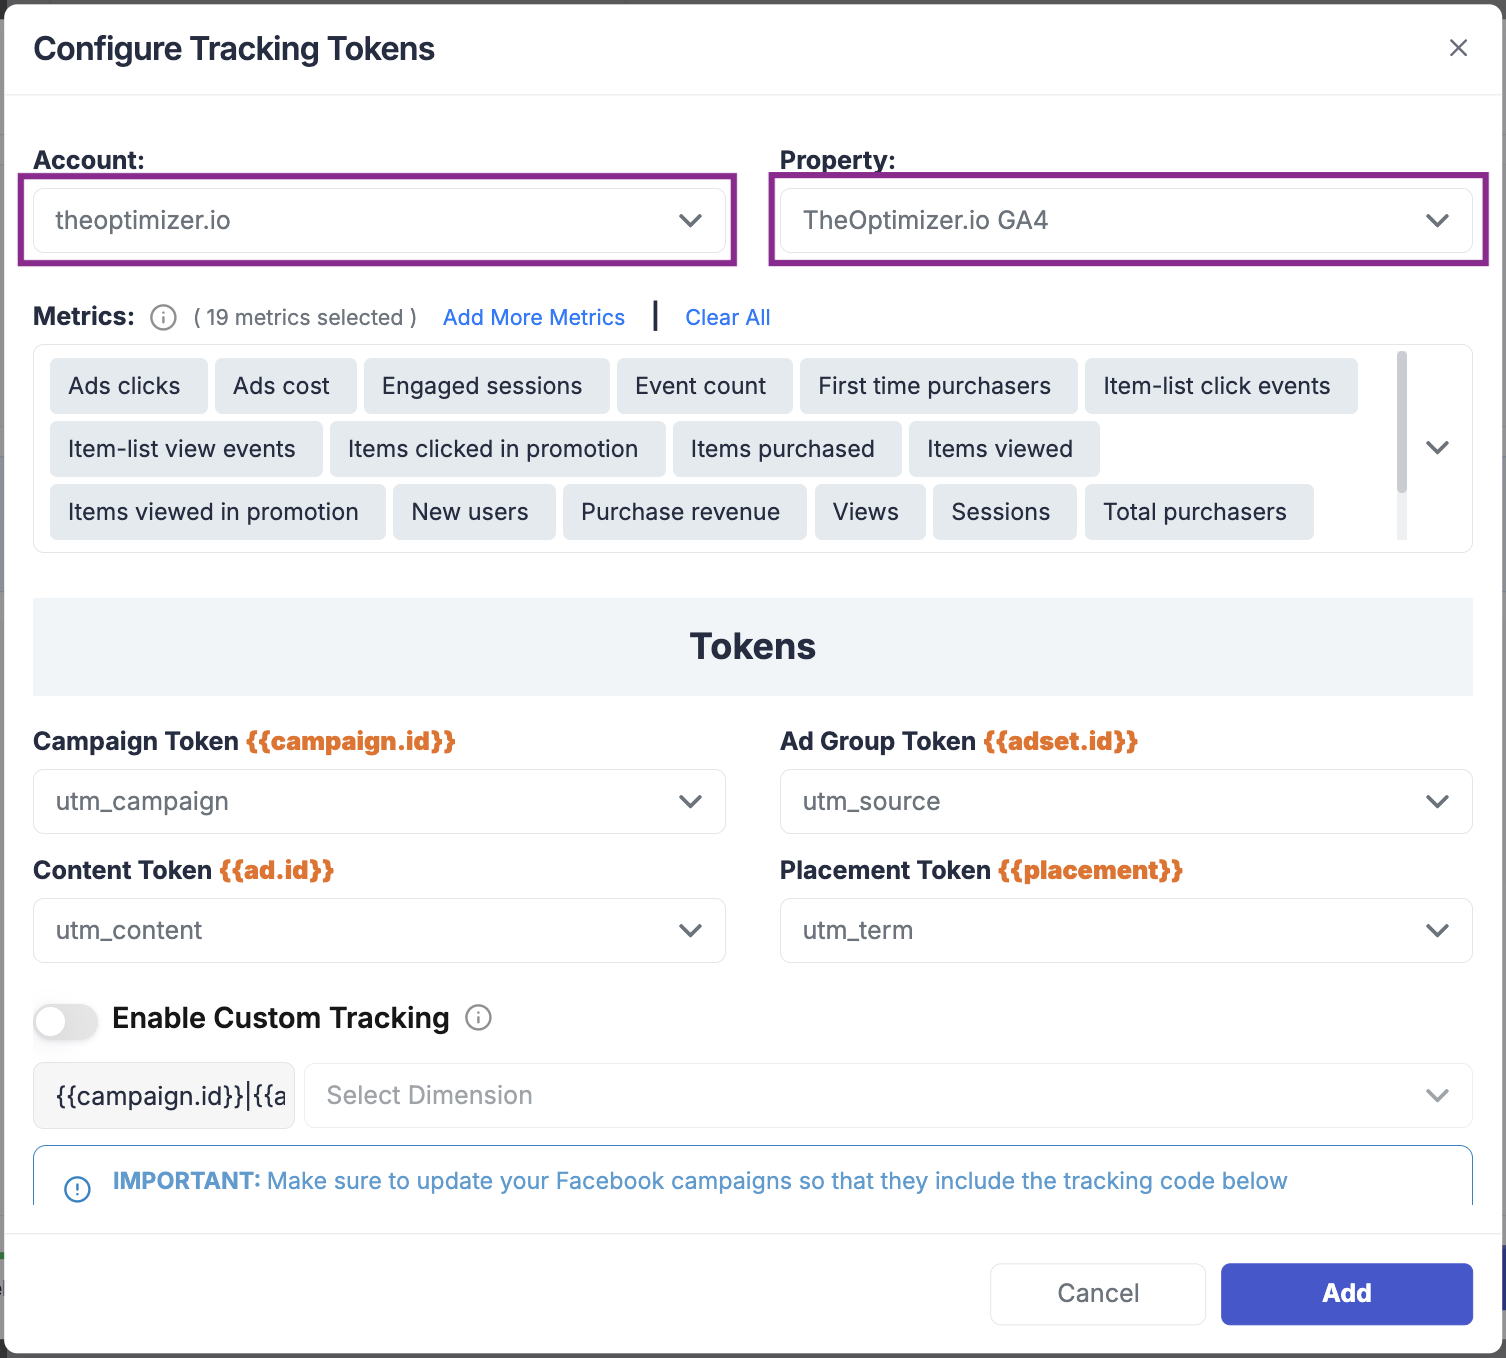
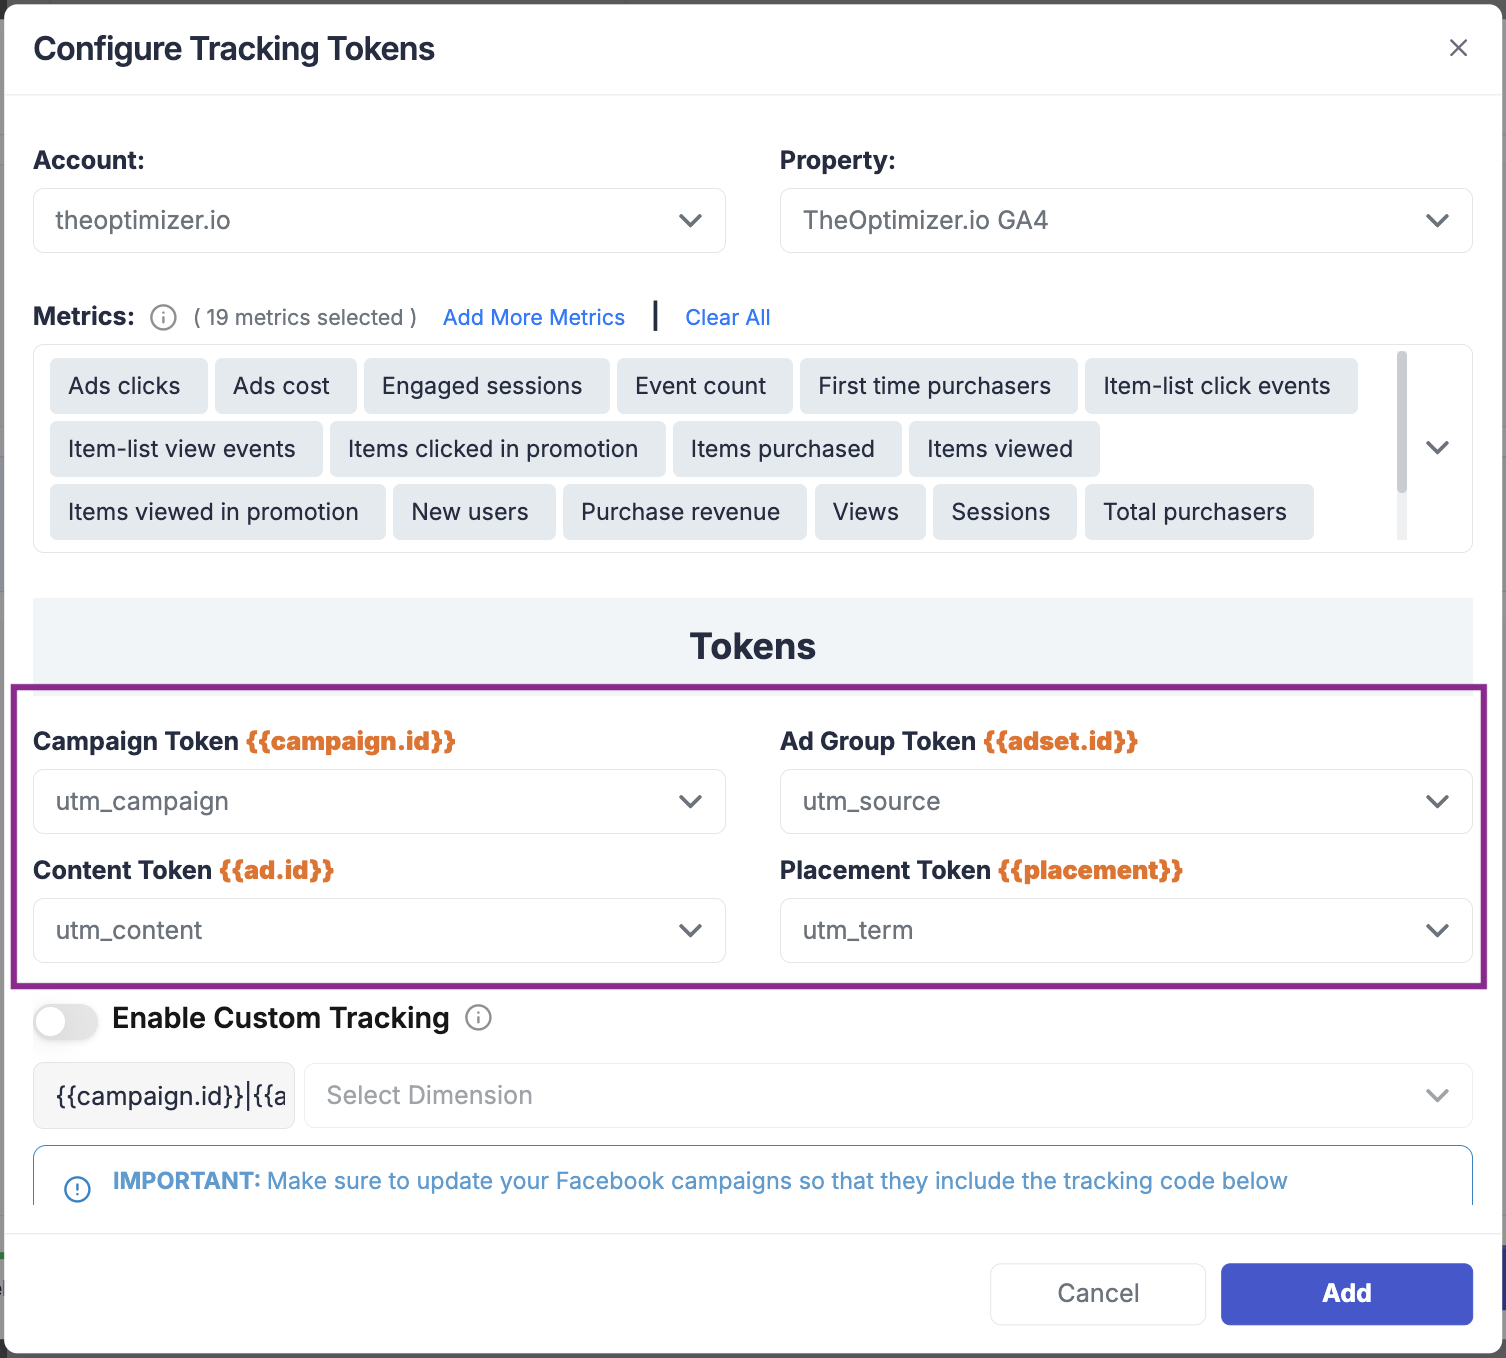
Step 5 — Configure Macro Mapping
The macro mapping section is where you tell TheOptimizer how your campaigns are being tracked in GA4 — specifically, which UTM parameter (or custom dimension) carries each ad network dimension.
This mapping is what allows the platform to correctly attribute GA4 sessions and metrics back to the right campaigns and ads.
The number of macros to configure depends on the ad network
Example mapping for Facebook using standard UTM parameters:
| Facebook Macro | UTM Parameter |
|---|---|
| Campaign ID | utm_campaign |
| Ad Set ID | utm_medium |
| Ad ID | utm_content |
| Placement | utm_source |
Using Custom Dimensions Instead of Standard UTMs
If you are already using the standard UTM parameters for other purposes — for example, using utm_campaign to pass the campaign name rather than the campaign ID — you cannot also use the same parameter to pass the campaign ID to TheOptimizer.
In this case, you should create custom dimensions in GA4 and pass the required ad network IDs (Campaign ID, Ad Set ID, Ad ID, Placement) through those custom dimensions. You can then select those custom dimensions here in the macro mapping, instead of the standard UTM parameters.
To verify your custom dimensions are working correctly before completing the setup:
- Open the GA4 reporting dashboard.
- Generate a report broken down by the custom dimension you are using for Campaign ID.
- You should see your Facebook (or other network) Campaign IDs appearing as the dimension values.
If the Campaign IDs are not appearing, something in your tracking setup needs to be fixed before TheOptimizer will be able to pull the data correctly.
ℹ️ If you do not have campaign IDs, ad set IDs, ad IDs, and placement IDs flowing into GA4 at all — neither via standard UTMs nor custom dimensions — you will need to set that up first before this integration can work. TheOptimizer needs these identifiers to match GA4 data back to specific campaigns and ads.
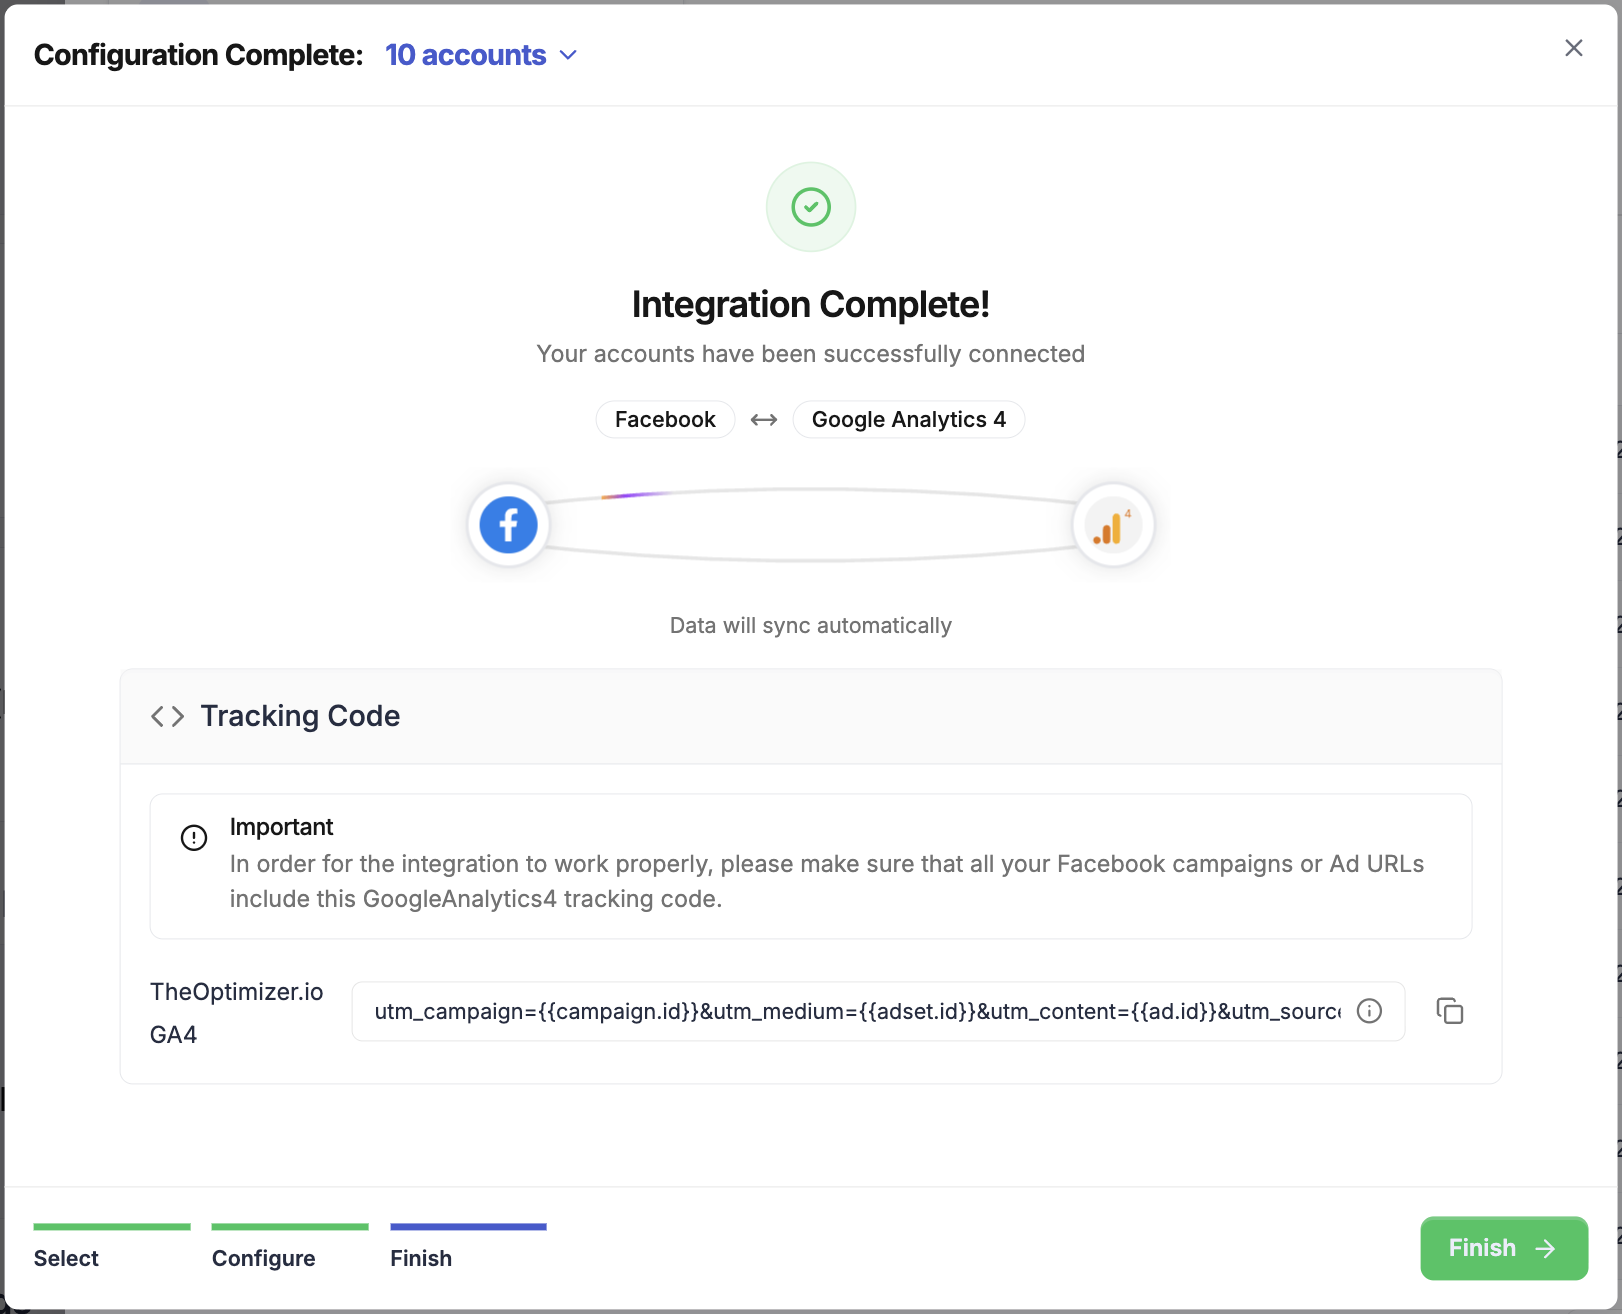
Step 6 — Complete the Integration
Once you have configured the macro mappings, click Add to save the property. You can add multiple properties at this stage if needed. When you are done, click Connect Tracker to finalise the link between GA4 and the ad account.
After completing the integration:
- Allow 20–30 minutes before GA4 metrics begin appearing in TheOptimizer. This is the initial sync delay — it is expected behaviour.
- Check your column visibility. GA4 metrics are not displayed by default. Go to your column settings and add the GA4 columns you want to see to your current view, or create a new custom view.
- Check the tracking code reminder. At the end of the setup flow, TheOptimizer will show you a tracking parameter code. If your campaigns are not yet passing the macro data to GA4, you will need to append this tracking code to your campaign URLs. If your tracking is already correctly set up, you can ignore this reminder.
7. Connecting Google Sheets
Why Use Google Sheets?
The Google Sheets integration is the solution for users whose tracking platform is not natively supported by TheOptimizer. Instead of a direct API connection between your tracker and TheOptimizer, you export conversion data — clicks, conversions, revenue, or any other metrics — from your system into a Google Sheet. TheOptimizer then reads from that sheet automatically every 30 minutes and makes the data available alongside your ad network metrics, just like any natively integrated tracker.
This integration effectively turns any tracking system into a compatible data source — as long as you can export its data to a Google Sheet in the correct format.
Step 1 — Add the Google Sheets Integration
From the left-hand menu, go to Integrations, scroll down to Analytics & Reporting, and click Connect on the Google Sheets card.
A setup dialog will appear. Start by giving the integration a name — for example, "My Tracker Data" or the name of the platform you're exporting from.

Step 2 — Clone the Template
Below the name field, you will find a link to clone the required Google Sheet template. Click it — if you are logged into a Google account, this will automatically create a copy of the template in your Google Drive.
⚠️ You must use the provided template. The Google Sheet must follow a specific structure for TheOptimizer to be able to read it correctly. Do not create your own sheet from scratch.
Open the cloned template and review it carefully:
- Each column has a description explaining what data it expects and how it should be formatted.
- Hover over column headers for additional inline notes.
- Look for any additional sheets within the document — some templates include extra sheets with extended documentation or examples.
- The data format, column order, and naming must match the template exactly.
Step 3 — Share the Sheet with TheOptimizer
For TheOptimizer to read your Google Sheet, you must share the sheet with TheOptimizer's service account. The service account email address is displayed in the integration dialog.
Copy the email address shown in the dialog, then in Google Sheets:
- Click Share in the top right.
- Paste the service account email address.
- Grant it Viewer or Editor access.
- Click Share.
⚠️ Without this step, TheOptimizer cannot access the sheet and the integration will fail. Make sure the share is completed before clicking Connect.
Step 4 — Enter the Sheet URL and Currency
Back in TheOptimizer integration dialog:
- Paste the Google Sheet URL into the URL field. Use the URL of your cloned and populated template.
- Select the currency that your revenue data is reported in. TheOptimizer needs to know which currency the values in your sheet represent so it can display and calculate correctly. Make sure this matches the currency your exporting system uses.
Click Connect. TheOptimizer will verify that it can access the sheet using the service account. If access has been correctly granted and the URL is valid, the integration will be confirmed.
Step 5 — Populate the Sheet and Keep It Updated
Once the integration is live, TheOptimizer will pull data from your sheet every 30 minutes. You are responsible for keeping the sheet populated with up-to-date data — whether that's a manual export or an automated export from your tracking system on a schedule.
Data Structure: One Row Per Entity Per Level
This is the most important thing to understand about how the Google Sheets integration works.
TheOptimizer reads the sheet and matches each row to a specific entity — a campaign, ad set, or ad — based on the ID in that row. You must provide a separate row for each entity at each level you want data for.
| Level | What to include |
|---|---|
| Campaign | One row per Campaign ID, with its clicks, conversions, and revenue |
| Ad Set / Ad Group | One row per Ad Set ID, with its clicks, conversions, and revenue |
| Ad | One row per Ad ID, with its clicks, conversions, and revenue |
For example, if you have 3 campaigns, each with 4 ad sets, each with 2 ads, your sheet should have:
- 3 campaign-level rows
- 12 ad set-level rows
- 24 ad-level rows
Each row must include the correct entity type (as specified in the template) alongside the ID and metric values.
⚠️ If a level is missing, TheOptimizer will not show data for that level. For example, if you only populate campaign-level rows, you will see Google Sheets data on campaigns in TheOptimizer but not on ad sets or ads. You must provide rows for every level at which you want data to appear.